How to glue the wallpaper?
Wallpapering is a situation that, if not all, of course every second person has encountered in his life. That wallpaper is now the most popular material in the decoration of the walls, despite the fact that the choice of possible materials is more than wide. Most often, wallpapers are re-glued on their own, and it would seem that there is no easier task in the construction business than this. But it is worth considering some nuances and tricks, so that the finished surface pleased you and was a matter of pride.
Necessary tools
In order to paste the wallpaper, in addition to the wallpaper itself, you need a number of tools, including:
- a spatula with a width of 30-40 cm and an angular spatula for applying putty;
- tank for preparing putty;
- paint bath for glue and for a primer;
- paint roller for priming;
- roulette in order to measure the right amount of wallpaper;
- scissors for cutting a strip of wallpaper of the required length;
- paint knife for cutting excess parts of wallpaper;
- roller or brush for applying glue to a wall or wallpaper;
- bucket for the preparation of glue;
- plumb to smoothly adhere wallpaper strips;
- a pencil to mark on the wall the level to which you will be guided when gluing;
- wallpaper pressing spatula to level the wallpaper immediately after gluing;
- soft rag or sponge to wipe excess glue from the wallpaper;
- a roller for wallpaper joints - it can be used to roll joints so that they are as small as possible;
- stepladder - it will be convenient to glue wallpaper with it near the ceiling.
Surface preparation
 In the whole process of wallpapering, it is the preparation of the surface that is almost the most important step, because no matter how professionally and accurately you glue the wallpaper, if the surface was crooked, then you do not have to wait for an aesthetic result. Therefore, it is important that the surface of the walls was flat and dry - it is easy to do, following the recommendations.
Cleaning the walls of the old coating
If the wallpaper is not glued to the walls in the new building, which before that were not finished with anything, then you have to tinker in order to remove the old coating, and this is sometimes not as simple as it seems.
Removing old wallpaper
 Gluing a new layer of wallpaper on top of the old is not recommended, since in this case both layers can peel off at any time. In addition, if the old layer has a bright pattern, and the new wallpaper is plain and thin, it is clear what the result will be - the previous layer will remind of itself. Based on the rule that the wallpaper will stay better and look on a perfectly flat surface, we conclude that it is better get rid of a layer of old wallpaper.
It is better to cover the floor with a dense plastic wrap and stock up tool kit in the form of a bucket with warm water or liquid for dissolving wallpaper glue, several spatulas of different shapes, a roller and a sponge. In the lightest case, after the wallpaper is moistened with warm water, it will begin to recede slightly from the surface of the wall, and removing them with a spatula will not be very difficult. Instead of water in more difficult situations, you can use special compounds that dissolve the adhesive faster. Instead of such compounds in warm water, you can add a dishwashing detergent, fabric softener or other products that can affect the glue.Wide spatulas will help to fake wallpaper in open places, but corner ones will cope in more inaccessible ones.
In some cases may need even a knife and a wallpaper tiger - a roller with several needles, thanks to which you can pry off and remove pieces of old wallpaper. Wallpaper glued with PVA is considered the most difficult case - these cannot be removed even with the help of special compounds, so you will have to work with sandpaper or drill with a nozzle in the form of a metal brush. A home steam generator may come to the rescue.
Removing old paint
 Removing the old layer of paint is a much more complicated task than removing old wallpapers. After all, a smooth and painted surface is not a good option for wallpapering. Often, to simplify their task, many simply sand a painted surface or apply it primer, but in this way there is no guarantee that the wallpaper will not peel off after a couple of months or a year.
Therefore, it is better to play it safe and still try to remove the paint layer. Can be used building hair dryer, which will heat the paint, and it will eventually melt and bubble, then it can be carefully removed with a spatula. This method is quite laborious and not very safe, since harmful chemicals evaporate.
There is an alternative option - this is the use of grinding machine or grinders with certain nozzles, but this is a very dusty task, so first you need to open the windows and close all the doors to other rooms, as well as the slots, if any.
You can use a special wash - often this is one of the most effective ways to remove old paint. But here you also need to remember your own safety and wear gloves, glasses and a respirator. After all the work done to remove the paint layer, the surface is cleaned of dust and dirt with a rag and water, and give it time to dry.
If none of these options help, then you can take primer concrete contact, which contributes to a stronger adhesion of wallpaper.
Putty walls
 At this stage, you need to achieve a perfectly flat surface. Before you begin to putty, assess the condition of the wall. If there are only individual irregularities on it, then some experts recommend saving at this stage and applying a layer of putty only in the most problematic places. But this method is doubtful, therefore it is better not to be greedy and putty the entire surface. To do this, you will need several spatulas - the usual one for corner sections and putty.
It is better to apply it in two thin layers, otherwise the strips from the spatula will be very noticeable. And so, it is better to putty first in the vertical direction, and then in the horizontal. Another option is to do everything diagonally. A spatula with a width of 30-40 cm, which must be kept at an angle of 25-30 degrees, is perfect for these works. Do not forget also about the angular spatula.
When the layer has dried, you can proceed to sanding it with sandpaper and to eliminate the dust that has appeared. Then put a finishing layer of putty to smooth even the smallest irregularities, this layer is also sanded.
Primer surface
 The final step before directly wallpapering is the primer of the walls. There are many primers themselves, and each of them is designed for specific conditions and surfaces. And if you consider that many recommend priming simply with a diluted solution of wallpaper glue, then there are even more options. So, The main types of primers are:
- Acrylic primers can be safely called universal, as they are suitable for almost any surface and also dry quickly and have no unpleasant odor;
- Alkyd are already purely specific - they are great for wooden surfaces, and dry out about 15 hours;
- minerals are good to use for priming concrete and brick surfaces, but the drying time will depend on the surface itself and the specifics of the composition;
- deep penetration primers can additionally strengthen loose or porous surfaces, penetrating to a depth of 2 cm. They, like many other types of compositions, may contain special additives that will prevent the formation of mold or the development of microorganisms;
- primer with coloring properties - such compositions give the surface a certain shade. Especially popular are white primers, which form a uniform color and are often used if you need to glue thin wallpapers.
The primer can be sold ready-made or dry. As for the choice, you need to build on the type of wallpaper and surface, and consultants in construction stores should advise you on the best option. If you purchase a primer in dry form, then before preparing it, you need to carefully study the instructions, which indicate the proportions and consumption for 1 m2.
It is not difficult to apply a primer - you need either a roller, or a brush, or a spray. For added convenience, you can use the telescopic bar to reduce the number of movements around the room with a stepladder and simplify access to the most distant and difficult places.
Glue preparation
 Glue often attached to a specific type of wallpaper, but in its absence, choosing the right one in a hardware store will not cause problems. Instructions for its preparation are indicated on each package, and, as a rule, it is required to dissolve the powder in a certain volume of water, stirring it all, and after a while, mix again, after which the glue is ready. However, some experts recommend adding a little PVA glue to the composition to increase the reliability of wallpaper bonding.
It is worth noting that for vinyl wallpaper use special glue for non-woven and paper You can use glue for vinyl or non-woven wallpaper. But for vinyl it is better not to use glue intended for gluing non-woven wallpaper. In this case, you can choose this type of glue so that it still prevents the formation of mold and fungus.
Wallpaper Preparation
 Just before sticking, you should deal with the wallpaper: cut into strips, calculate how they will be located on the wall, etc. If the wallpaper is plain, then you can immediately cut them into strips, and the length should be 5-7 cm longer than the height of the walls - the excess after drying is cut with a knife. If there is any pattern on the wallpaper, then there will be more work, since you will have to first compare all the stripes and cut off the excess.
Wallpapering
Gluing the wallpaper starts from the corner of the room, and if the wallpaper is glued with an overlap, it is better to start from the angle that is closer to the window, so that the borders are less noticeable. But since now the butt sticker is increasingly being used, you can start from any angle. Immediately it is worth noting that the corners in apartments are rarely perfectly flat, so you should deviate from it approximately by the width of the wallpaper strip, and use a plumb line to draw yourself a straight line, which you should focus on when gluing. Before each new segment, this procedure is recommended to be repeated.
 Glue applied either on the wallpaper itself or on the walls - it all depends on the basis. So, if this wallpaper is on a paper basis, then the glue is applied on them, it is left for 10-12 minutes (depending on the instructions) so that they are saturated, and only then proceed with gluing. If the wallpaper is non-woven, then they practically do not absorb glue, so there is no need to apply glue directly to them - you can use the dry method.
If glue is applied to the wallpaper, then it should be done from the center to the edges, while the edges need to be well smeared. But do not allow the glue to get on the front side.If it is applied to the wall, then the width of the strip of application should be slightly larger than the width of the canvas wallpaper.
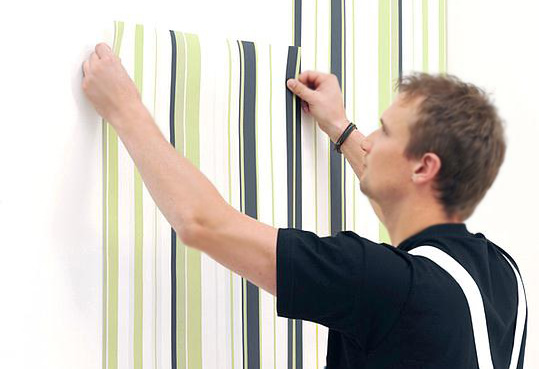
 Wallpaper glued from top to bottom, smoothing with a roller from the center to the edges like a "herringbone", so that excess air comes out, and gluing was most effective. If the glue sticks out a bit, it's okay - just gently remove the excess with a damp sponge or rag.
The next sheet of wallpaper is glued in exactly the same way: a landmark is drawn using a plumb line, glue is applied, smoothed, etc. Moreover, if the wallpaper has some kind of pattern, then make sure that it matches.

Difficulties may arise when gluing corners, window openings and sockets. It is better not to paste over corners with whole sheets of wallpaper, otherwise after drying they will most likely come off. Here it is better to use overlapping glue about 2.5-5 cm, and even if a solid sheet falls at an angle, it is better to cut it and glue it with an overlap.
As for the sockets and switches located on the wall, they should first be de-energized, then remove the front side. The canvas is glued on top, and above it should hang freely so that it is easier to cut a specific hole with a sharp knife. Then the cloth is glued to the end and the front sides are installed. The segments of the walls that are above and below the window and door openings are pasted over with residues after gluing whole strips. Wallpaper for painting is better to start painting when they dry out, i.e. at least for the next day.
The whole gluing process is best done without drafts to reduce the likelihood of air bubbles forming under the wallpaper. At the same time, in the process of drying, it is also necessary to ensure their absence, therefore it is better to keep all the windows and doors closed.

We eliminate possible defects
Even if you follow all the above rules, there is no full guarantee that some defects can be detected later. Here are the main possible problems and solutions:
- the appearance of blistering or wrinkling. Such a defect may appear if the glue on the wallpaper was not sufficiently cured, the wallpaper was poorly smoothed, or the glue has been dry for a very long time. The best way out of this situation is to re-stick, but it is too radical. If the wallpaper is not too thick, you can try to puncture and smooth the surface: if the result suits you, then the problem is solved;
 wallpaper peel off near cornice or skirting boards - a consequence of insufficient gluing them around the edges. In this case, everything is very simple: gently bend the wallpaper, apply glue to them or to the wall (depending on which wallpaper was used), and press it well, smoothing the surface;
- noticeable seams - Another problem, they appear when the wallpaper glued to the overlap glues in the wrong order, as if against the light. You can try to carefully peel off a piece of wallpaper and glue it in the right direction, or just come to terms with what happened;
- thickened seam it is also corrected radically - by re-gluing wallpapers, so you should be aware in advance that it is unnecessary to glue thick wallpaper with an overlap;
- and, of course, if you decide to save time and money, hoping that everything will be right for you and the new wallpapers will be glued to the old ones, the surface will not be properly aligned, etc., then you may not like the final look of the walls. We’ll have to do everything anew and according to the rules, so save correctly.


 11 ways to remove old wallpapers from walls quickly and easily
 How to choose the right wallpaper, what they are
 8 tips for choosing a primer for wallpaper
 7 Tips for Choosing the Best Wallpaper Adhesive
 11 tips for choosing the right skirting board
 Wallpaper border: 5 tips for choosing and sticking ...
 Non-woven wallpaper: selection, sticking and painting
") Carpet wallpapers: selection and sticking (tufted wallpapers)
Carpet wallpapers: selection and sticking (tufted wallpapers) Liquid wallpaper: properties and application
 Wallpaper for painting: types and techniques of painting
noticeable seams - this can also happen due to sloppy work. The table on which the wallpaper is spread with glue should be clean as well as the hands of the master.
The best option is to glue non-woven wallpaper. Coated the walls with glue and pasted a strip. Fast, clean and tidy.