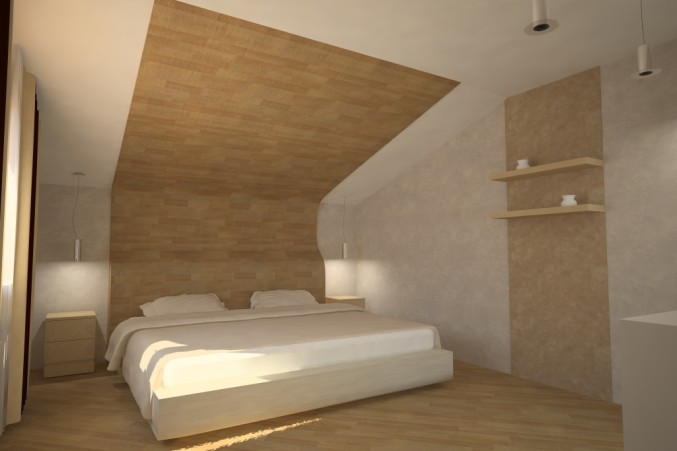
Laminate ceiling. How to fix the laminate to the ceiling
Laminate proved to be a universal coating. Today, they finish not only the floor, but the use of the laminate as decoration material for walls and the doors no longer surprise anyone. So why not use it to create a spectacular ceiling in the room. Such a room instantly transforms, acquires proper comfort, and at the same time, almost everyone can cope with laying the laminate on the ceiling. So, how do you finish the ceiling with laminate, and what benefit will you get from this?
Advantages and disadvantages
Laminate as a ceiling finishing coating boasts a lot of advantages, which are explained by its structure. So, the basis of this material is wood, so he inherited many properties from it. And while the rigidity and resistance to deformations that a laminate needs to withstand loads as a floor covering remain unnecessary for the ceiling, still this material It has a number of other positive qualities:
 laminate quite durable, especially when it comes to its use as a ceiling coating, since it will not be subject to constant exposure;
- laminate as much as possible easy to care;
- range laminate flooring can drive crazy even an experienced designer, so you certainly will be able to choose the color, shade and nuances of the texture in accordance with the interior. Laminate flooring can imitate not only the structure of any wood species, but also disguise itself even under a stone;
- laminate flooring is different good heat and noise insulation properties, and if at the same time during installation use additional insulation, then the microclimate of the room can be significantly improved;
- laminate is quite possible ceiling mount do it yourself is not much more difficultthan laying it on the floor or walls;
- price This finishing material is not so high, so the laminate can be used in decorating the room, even if not very large funds are allocated for repairs.
To create a complete integrated impression of this type of ceiling decoration, it is worth noting that laminate flooring differs in a number of disadvantages:
- since the laminate afraid of water, then it is better not to use it as a floor or ceiling coating in places where high humidity is the norm (bathroom, kitchen);
- fear of moisture can make itself felt if the roof leaks or you are flooded by neighbors from above. In this case, the coating is unlikely to be saved - it will need to be dismantled. But if in advance organize reliable waterproofing, then such consequences can be avoided;
- since the laminate is still artificial coating, in the production of which adhesives are used, toxic substances can be released during operation, the evaporation of which becomes more intense when heated. To avoid this negative impact on health, it is better to ventilate the room after laying the laminate for at least a couple of weeks.
Choose a laminate for the ceiling
 If the advantages of using a laminate as a ceiling coating outweigh all the disadvantages, then go to the next stage, which precede the installation of the laminate on the ceiling - it's his choice. Naturally, there is no laminate that is designed for installation on the ceiling or walls - the whole huge assortment presented in stores is all the usual laminate that is installed on the floor.
Such a parameter as strength can be immediately thrown back, since in our case there is no need to walk on the laminate. Optimally in our case, a laminate of class 21, 22 and 23 would suit, but it has already ceased to be produced, so you will have to choose the one that as light and thin as possible.
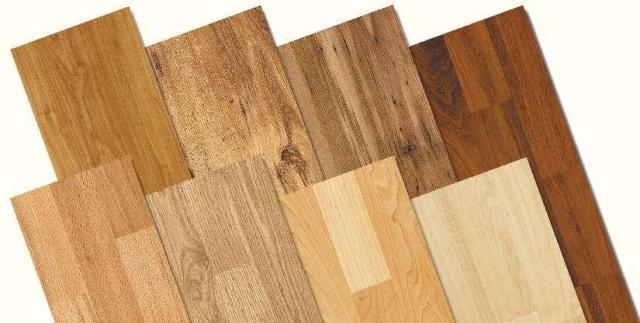
Important parameters become width and length each individual fragment. So, now you can meet completely different options: how 40 * 40 cm square tilesso and standard boards 120 * 14 cm, and even more overall boards 200 * 20 cm. It should be noted right away that it is better to buy a laminate from one seller from the same manufacturer and from the same batch, so that later it does not turn out that the differences in color and shade are very striking. Just in case, it’s better to take the material with a margin so that you don’t run to the store and look for something as similar as possible to a laminate already purchased, and guessing with a shade will already be difficult. Optimal - take a laminate with a margin of about 15%.
 As for the choice best laminate flooring, then you need to build on the convenience of working with the material and the dimensions of the rooms. It is better if the material covers the ceiling with a minimum number of joints. So, for example, for a narrow balcony with parameters 2 * 6 m, 2-meter laminate boards are perfect, but for a room 3 * 6 m it is better to choose strips 1.5 m long. Note that working with boards more than 15 cm wide is not very convenient, since they are heavy, which complicates the installation.
When you have decided what type and size of the laminate is optimal in your particular case, it’s worth going to choice of color, texture and other decorative features.
How to finish the ceiling with a laminate?
It’s easy to fix the laminate to the ceiling: there are two effective ways to do this. One of them is glue, which will require a perfect state of the ceiling: it should be even, smooth, with no visible flaws. In addition, you can use the frame method: fasten the laminate boards with nails, clamps or self-tapping screws to a previously prepared crate.
Whatever method is chosen, it is better to leave the laminate before use for a couple of days to remain aged without packaging in the room where it will be mounted. This will allow the material to take optimal parameters.
Glue the laminate on the ceiling
 This method is justified only if if you must necessarily keep the height of the room. At the same time, the surface of the ceiling should be perfectly flat and strong. To achieve this, you can use sheet materials, which again will affect the height of the room, or long and carefully level the surface of the ceiling. It will be necessary to putty it several times, wait until each layer is dried, and only then prime it. The process is not the fastest, and is labor intensive.
For this type of work, a special two-component adhesive is used, which is very toxic until it dries completely. That is why before starting the installation it will be necessary to carefully study the instructions for working with it and adhere to it during the work.
The sequence of work is as follows:
- necessary grease the area of the ceiling with glue;
- glue can be applied to the underside of the laminate for a laminate for greater strength, but you can do without it. You should also treat the grooves of the joints with sealant to increase the strength of the entire structure;
- It’s better to start installation of the coating from the far left corner of the room;
- towhen the first panel is firmly glued to the ceiling, exactly the same fasten the next oneconnecting it with the help of a locking mechanism, and only then pressing it to the surface;
- so as not to hold all the boards with your hands until they firmly adhere to the ceiling, you can use special props;
- if the surface area to be trimmed is small, or if it is necessary to decorate only part of the ceiling with a laminate, then you can assemble the structure first on the floor, and then completely glue it to the ceiling in order to facilitate your work. Dfor large rooms the whole process is carried out according to the scheme described above, and installation in this case is very similar to similar work on laying the laminate on the floor.
The glue method of laying the laminate on the ceiling is not considered the easiest, and it will require a lot of effort and patience from you. In order to achieve a high-quality connection of the panels, they, as well as when laying on the floor, must be knocked together. But to do this is not so simple, because there is a great chance that the whole structure will begin to deform, shift, and some panels even peel off. There are different ways out of this situation. Many work with an assistant who will hold already glued boards, thereby saving them from displacement. But a more reliable option is to nail each board into the groove to the base with small nails, which cannot but affect the simplicity of the work.
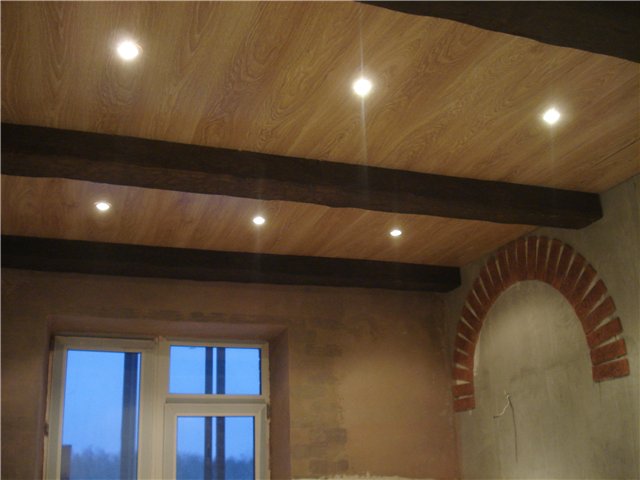
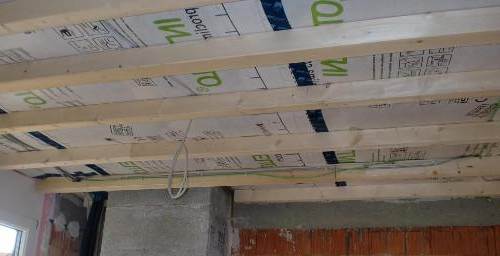
We mount the laminate on the frame
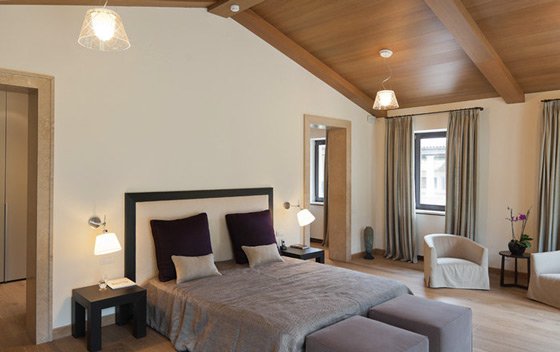
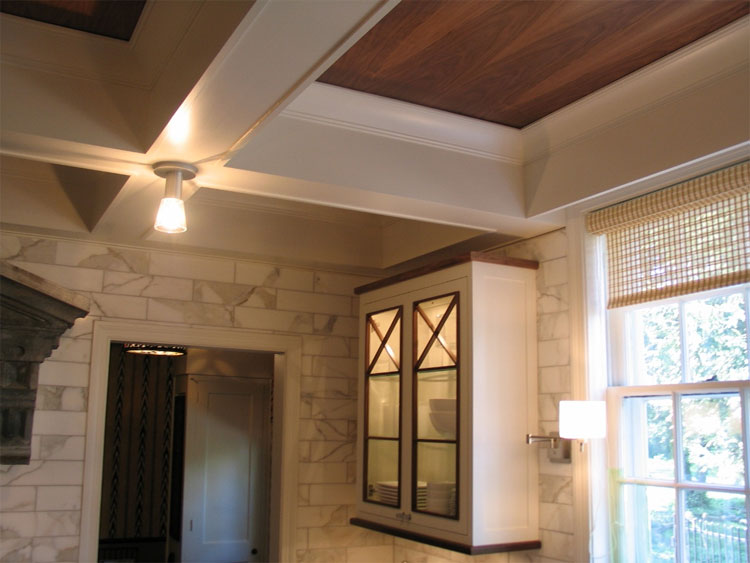
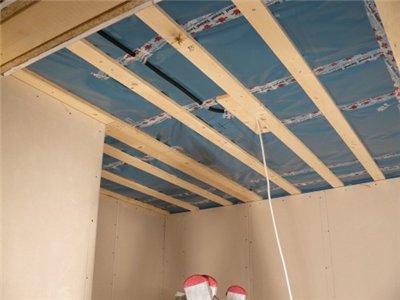 In this case, installing the laminate on the ceiling can take less time and take a lot less power, but you should also pay attention to the preparatory work. The advantage of this method is that numerous wet and dirty processes are absent, which already simplifies the entire installation. In addition, this option even takes away the height of the room, allows you to hide the fixtures of the fixtures under the communication ceiling, and as a result, the most aesthetic and attractive design is obtained.
Before starting work, the ceiling surface should be cleaned from previous layers of finish and primed so that in the future, the remains of old plaster or paint do not fall on the frame with the laminate. The frame can be attached directly to the ceiling with self-tapping screws or can be mounted on suspensions at a certain distance from the ceiling. The option is selected depending on the characteristics of the room, the height of the ceilings and the need to hide some communications under the cover.
To organize the frame, it is better to choose a dry wooden beam than a metal profile: the arrangement of fasteners will be much easier. Nevertheless, the metal will still be more reliable, and it is better to pre-treat the wood with an antiseptic solution.
What will be the sequence of steps for laying a laminate in this case?
- start with what you need clearly define and set the levelon which the structure will be located and the laminate will be attached. It depends on how smooth and aesthetic the final result will be, so we accurately determine the level of the ceiling and beat off the necessary level on the walls. To determine the necessary points, you can use the laser level, which is suspended from the center of the ceiling, and which accurately shows those places where you can fix the side plinth;
- frame elements are best installed across the room, but this is explained by the fact that it is better to lay the laminate perpendicular to the wall on which the window is located, and the frame elements are installed across the direction of installation of the laminate. The step between the individual beams should be no more than 50 cm, and they are attached to the ceiling with screws with dowels
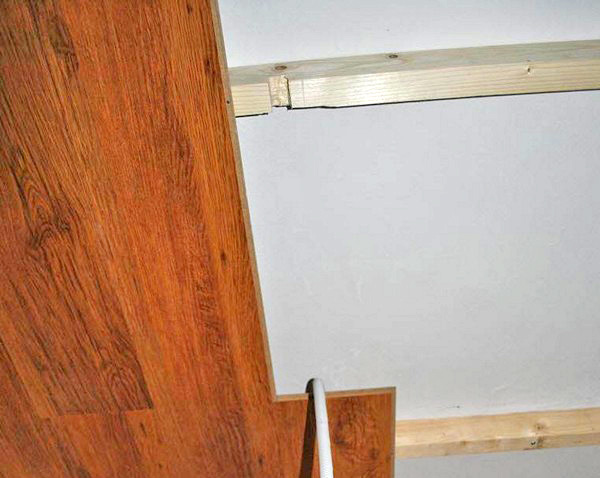
- start laying stands from any far corner of the room, and at the same time, you can use small carnations to attach the boards to the crate (if you use a wooden beam as a frame): you should not worry about aesthetics, because from this distance they will not be visible. To get the perfect result, you can use clamps, such as those used for lining, but this method will take you more time, because you will have to cut the laminate locks in the places where the fastening will be installed;
- so that avoid possible warping of the laminate, when installing it, it is better to deviate 1 cm from the walls. To precisely observe this barrier, you can nail wedges for the duration of the arrangement, and then dismantle them;
- each the next board is mounted as the previouswhile docking with her. After laying the entire structure, install skirting board.
That's basically it. As you can see, the process is a bit more complicated than laying the laminate on the floor, but also quite feasible on our own.

 Laminate for the hallway: which one to choose, with what to combine
 Laminate wall decoration. How to fix the laminate on the wall?
 7 materials for finishing floors in the bathroom
 Which laminate flooring is better to choose?
 Do-it-yourself laying laminate flooring. Stages of work
 10 materials for finishing floors in the kitchen
 9 materials for finishing the floor in the nursery
 7 Tips for Choosing a Vinyl Laminate
 The laminate sighed: 7 tips on what to do
 Laminate or parquet: what to choose?
Another way to fix the laminate to the ceiling is to install supporting wooden beams. But, given that small nails will be invisible, the method described above is more advantageous