Platbands for interior doors: 5 tips for choosing platbands
In very rare cases, repairs in the apartment can do without replacement interior doors to new ones. There may be several reasons - either the old paintings do not fit the new modern interior or are simply tired, or the floor covering has changed, and the operation of the doors has become simply impossible. In any case, it will become before you the choice not only the canvas itself, but also platbands to him. A variety of shapes, sizes, colors and textures can put many in a difficult position. Therefore, today we will take a closer look at the characteristics of this important element and give selection tips platbands for interior doors.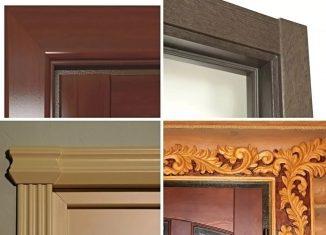
1. The functional purpose of the platbands
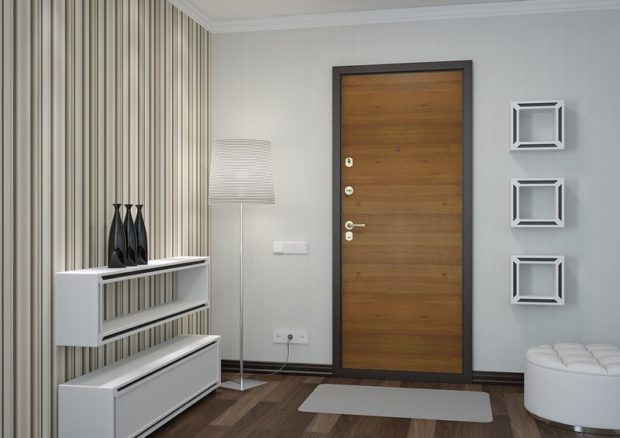
Platbands - this is a very important component of the entire door structure, which is a flat or three-dimensional strips width about 70 mm and thick from 8 to 10 mm. They draw up the entire perimeter of the doorway. For what this is done:
- Their primary role, of course, is to disguised places of fastening the door frame to the walls. You see, after installing the door frame and the doorway, the appearance, to put it mildly, is not very attractive;
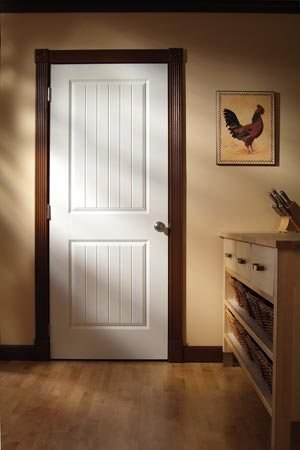
- Harmoniously selected platbands will help to make the opening neat and give it a complete look;
- In addition, such a frame will attract attention, and focus on the beautiful door leaf, which sometimes becomes the highlight of the entire room, preventing it from getting lost against the wall;
- Sometimes the platbands are not selected in tone with door leaf, and the color of furniture. Such a move combines two functions - creating an emphasis on the doorway by using several colors and linking to the overall color scheme of the entire room.

Platbands are used to decorate not only the usual swing doors, but also to decorate sliding systems, portals and arched vaults. As a rule, when ordering a door leaf, the most suitable door frame and trim are offered as a set. In this case, they completely repeat the color and texture of the door material and have a standard shape. If you want to choose a more interesting design option, you will have to buy the platbands yourself.
2. Types of platbands according to the material of manufacture
Wooden platbands
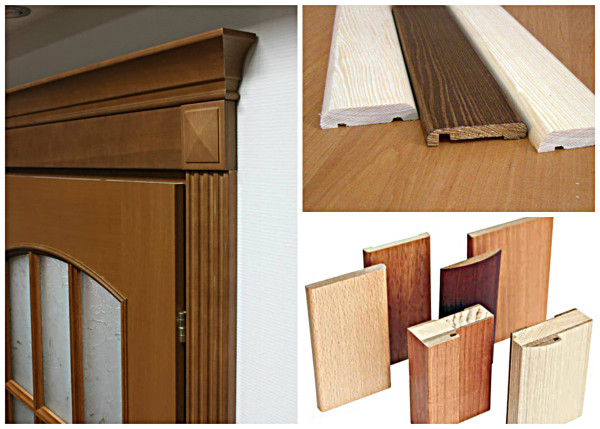
One of the most common types, which is environmentally friendly, reliable, appearance attractive and has a long service life. Hardwood, such as pine, is usually used as the material. Wooden planks are perfect for any style of door leaf and will advantageously complement its appearance. A huge advantage of this material is the ability to produce platbands of both the most familiar and non-standard configurations. Therefore, in turn, wooden platbands are subdivided on the:
- Equal - the simplest, but nonetheless, quite popular form. Due to this, they differ in affordable cost and versatility. We can safely say that this is a win-win option.
- Semicircular - having a characteristic rounding over the entire width. The rounding radius can be anything from barely noticeable to characteristically pronounced. This moment is selected purely individually, based on the preferences of the consumer.
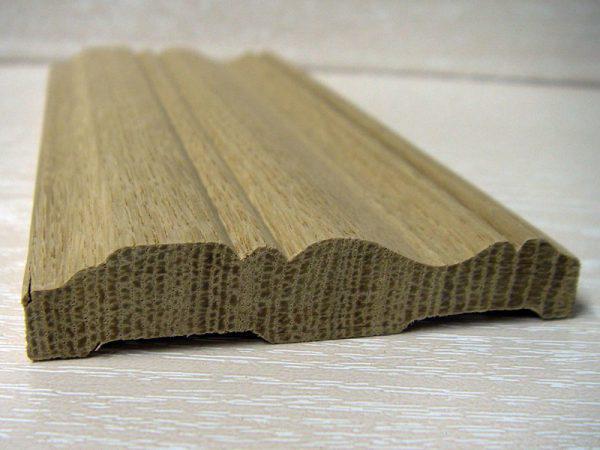
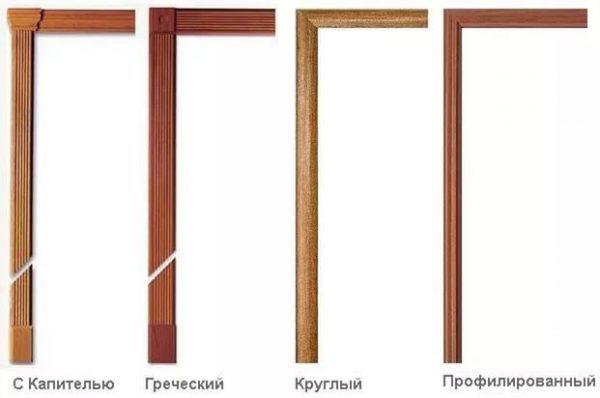
- The embossed version has a more interesting design. To implement the design idea and the maximum transfer of relief, use valuable wood, which significantly increases the cost of the finished product. The pattern can be made in the form of longitudinal stripes crowned at the corners with a capital or squares with a distinctive pattern. They remotely resemble small the columns. The relief is applied on specialized milling machines. This adds a little to their value.
- For use in rooms that are characterized by frequent changes in temperature and humidity, it is recommended to use platbands made of such wood species as maple or oak. For extra protection their surface is covered with special coloring compounds or natural veneer from precious wood. This type of platband can have both a flat and a raised surface.
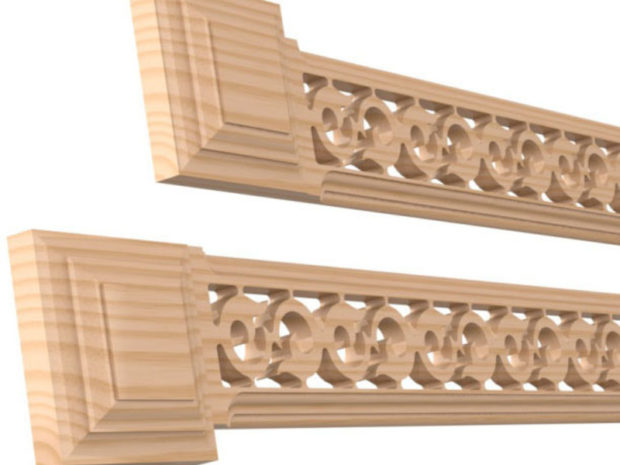
- Carved platbands are the most expensive and effective option. With their help, you can radically transform even the most ordinary door leaf, which does not have a hint of a pattern. They are perfect for decorating the doorway in classic or antique interiorwhere special attention is paid to the little things.
MDF platbands
Platbands from MDF are considered a budget option and are significantly inferior in value to their counterparts from the paragraph above. Despite this, their operational characteristics are in no way inferior, and in some moments even superior wood products. For example, this material is not susceptible to decay, which significantly increases their service life. Appearance is very close to natural, especially if not only color, but also texture is successfully selected. TO lack of a high coefficient of moisture absorption can be attributed, which can lead to swelling. Therefore, you should not install this kind of platbands in rooms with high humidity. By his form MDF platbands can be both flat and flat, and have a radius of rounding.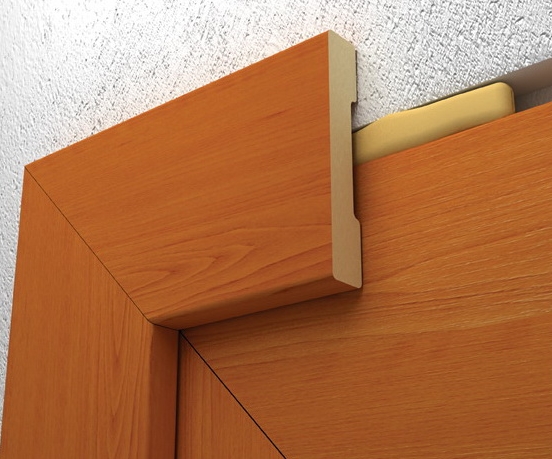
Plastic platbands
Considered quite practical due to its resistance to high humidity, ultraviolet radiation and temporary deformations. Caring for such items is a pleasure, because any contamination can always be tried with a damp cloth and detergent. Another undoubted advantage plastic is its immunity to temperature extremes, which is especially true in the bathroom or dining room. A variety of colors and textures will allow you to choose the option that is as close as possible to the appearance of the door leaf. And, of course, the cost of products from this material will be pleasantly pleased.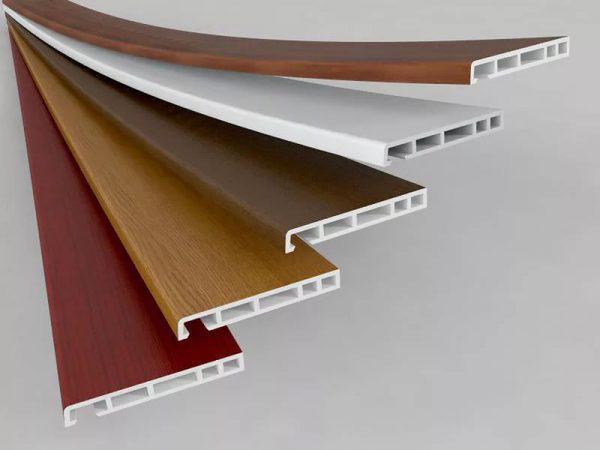
Platbands from metal
Many believe that metal platbands are more suitable for decoration entrance doors and then - from the outside of them. But in view of the fact that interiors in the style are gaining more and more popularity hi-tech, minimalism and loft, designers regularly use metal elements to frame interior doorways. Agree that it is almost impossible to imagine a room in one of the above styles without the presence of a cold shine on metal surfaces. Therefore, do not immediately discard this option. The most commonly used material is stainless steel or aluminum. The undoubted advantages of these materials are high strength and resistance to moisture. In addition, metal does not support the combustion process and it is very difficult to scratch a stainless steel. But aluminum is a softer material, you need to be more careful with it. By the way, such platbands can very easily be made on their own.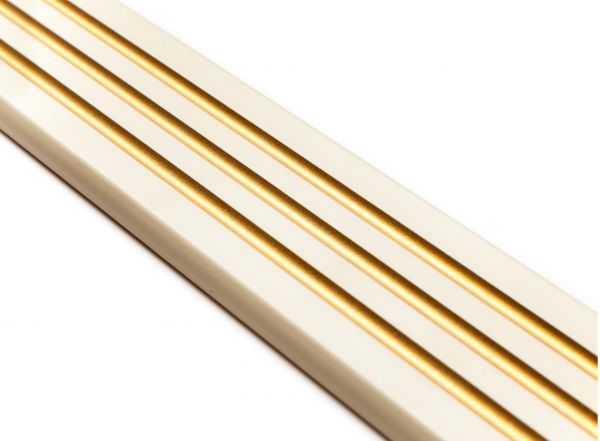
Ceramic trims
This option is not very popular due to limited use. With their help, doorways are formed in rooms whose walls are fully or partially lined artificial stone. Ceramic platbands are called elements made of ceramic tiles, which are attached to a special adhesive. This option will be appropriate for the design of doors to the bathroom from the inside. With the manufacture of such platbands, you will definitely be able to do it yourself. It is only necessary to carefully cut the tile into fragments of the required size and process the edges with sandpaper. If you show a little imagination, you can create an interesting composition of several types of tiles, which is present in the interior of the room. Also, artificial stone can be used as a material for such platbands. A doorway framed in such an interesting way will harmoniously complement the situation.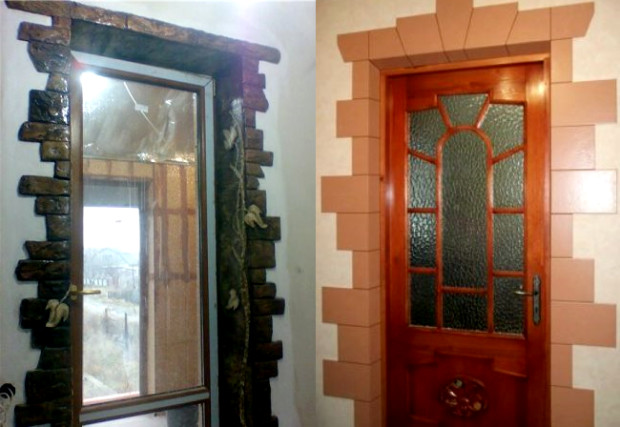
3. Types of platbands by the method of attachment and the device of the internal cavity
We figured out the materials of manufacture and possible surface forms, now as for mounting method door platbands. They are:
- External - which are mounted directly on the outer part of the door frame, covering a small section of the wall. These elements are independent and are attached using liquid nails or special hatless nails. After clogging, they become invisible.
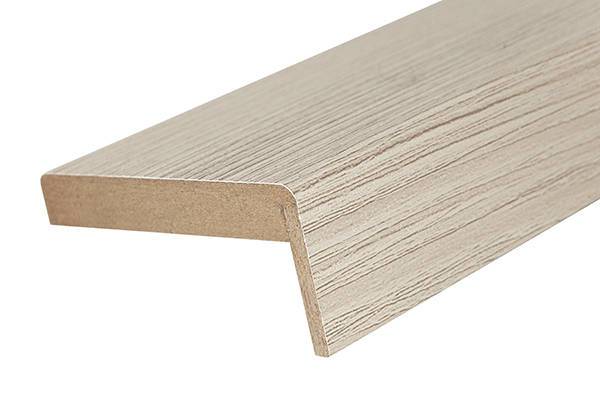
- Internal or telescopic - This option is more complex, as it is an element with a lock connection, which is attached from the inside to the door frame or to the additional strips. Such platband has the shape of the letter "G" along its entire length. One of its edges during installation should go into the groove on the door frame. Due to this method of fastening, it is possible to adjust the width of the door frame to the thickness of the wall without the use of additional strips. The possibility of adjustment lies in the range of 10-15 mm. The edge of the clypeus, which enters the groove, makes it easy to extend it to the missing size. At the same time, no glue is applied to it. Only the free edge is attached to the wall. Due to this, their front side remains absolutely smooth and not damaged. The installation process is very simple and fast. Minus telescopic platbands is their cost, which is many times higher than conventional overhead models. And you can ensure an aesthetic appearance only by performing a very precise trimming of such elements at the junction of two vertical and horizontal bars. By form they can be smooth, radial or curly. As material manufacturers use wood or polyurethane.
 Due to this method of fastening, it is possible to adjust the width of the door frame to the thickness of the wall without the use of additional strips. The possibility of adjustment lies in the range of 10-15 mm. The edge of the clypeus, which enters the groove, makes it easy to extend it to the missing size. At the same time, no glue is applied to it. Only the free edge is attached to the wall. Due to this, their front side remains absolutely smooth and not damaged. The installation process is very simple and fast. Minus telescopic platbands is their cost, which is many times higher than conventional overhead models. And you can ensure an aesthetic appearance only by performing a very precise trimming of such elements at the junction of two vertical and horizontal bars. By form they can be smooth, radial or curly. As material manufacturers use wood or polyurethane.
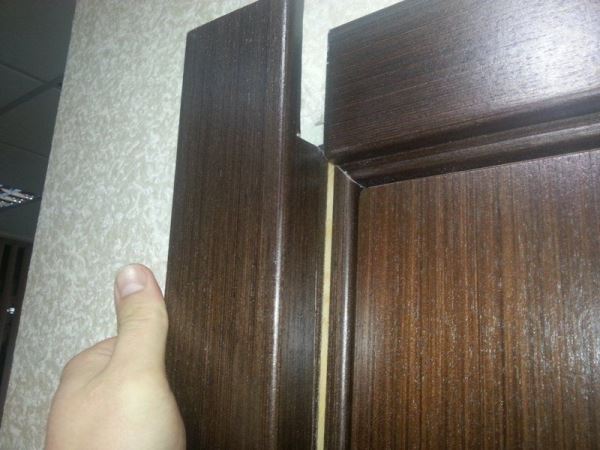
By the device of the internal cavity door trim can be:
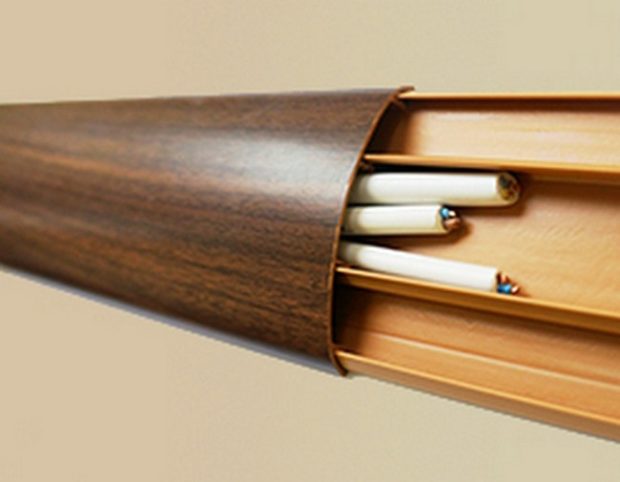
- Hollow or with cable channels - a very functional kind that allows you to hide not only the nuances associated with the installation of the door frame, but also various wires. The cable is neatly laid in special grooves along the entire length of the casing and is attached to the wall together in it. It is advisable to use this option if you are 100% sure of the reliability of your wiring.
- Monolithic or simple - in this case everything is clear, you get a solid bar from the selected material.
4. What to look for when choosing?
If you refused the platbands offered in the kit for the selected door leaf, then you are looking for something more interesting. What is it worth take into account:
- Material it is preferable to choose a platband similar to the material of the door leaf. Imagine how ridiculous plastic frames will look in combination with a door made of wood ... The exception is ceramic and metal products, which are designed to give an extraordinary accent.
- The size the casing should be selected depending on the size of the gap between the wall and the door frame immediately after installation. Platband should completely cover all the shortcomings, but at the same time it should look harmonious. If the gap is too large, it is better to carefully reduce it with the start puttiesthan buying a wider bar. Especially when it comes to openings of small width. IN ideal case width of platbands corresponds to height skirting board. Adhering to this rule, you can achieve the most holistic perception of the entire room.
- The form the platband is selected in accordance with the forms prevailing on the door leaf or furniture. For example, your door looks very strict and concise, has horizontal and vertical components that mimic a prefabricated structure. That is, straight lines prevail. This means that more smoothly complement the doorway with an even platband with a smooth surface or with vertical milling. Still worth paying attention to fittings. Sometimes, in order to mitigate such austerity, intentionally set doorknobs with rounded, streamlined shapes. If you want to achieve just such a contrast, support the idea by choosing radius platbands. In general, it is a matter of taste and personal preference. The main thing is that in alliance with the door the platbands look appropriate and harmonious.
- Color selection depends on the desired end result. Most often, platbands are selected exactly to match the rest of the elements. But there is a more interesting design option - when platbands choose a distinctive color. Their shade may differ by only one or two tones, and may have a completely contrasting color. In this case, the choice will be affected by the color of the floor plinth, walls or furniture. They resort to this technique when they want to emphasize once again the interesting design of interior doors and shade them.
- Mounting type also need to be considered. After all, metal, plastic, wooden or MDF platbands can be glued with special glue. And you can use furniture studs in the case of the same wood and MDF elements. Or maybe you liked the slats with a castle connection. Pay attention to the method of connecting parts to each other - at a right angle or at an angle of 45 degrees. Some manufacturers recommend the best pruning method for your model.
- External surface view selected solely from personal preferences and features of the style of the room. For example, if you have decorative columns in your room, and you tried to add a touch of ancient Roman times to the interior, then you cannot do without platbands that have a capital. This is the main rule - compliance with the interior of the room.
Take the purchase of door platbands responsibly, do not neglect the recommendations of specialists in the store and consider the features of your room. Then your choice will be successful and will complement the appearance of the doorway.
5. How to trim and trim the platband correctly
When the perfect platband model is selected, it's time to fix them on the door frame. For this it is necessary trim strips depending on the preferred method of fastening them. Most simple is an option when a short horizontal bar above the door is fastened between two vertical sides of the door. Under no circumstances should the upper platband cover the ends of the side elements. With this fastening, its side parts will be striking, which will have a distinctive color when cut. In the case of light elements, perhaps this will be imperceptible, but dark colors will instantly emphasize this drawback. Second popular the way mounting - when the side and upper bar meet at an angle of 45 degrees. 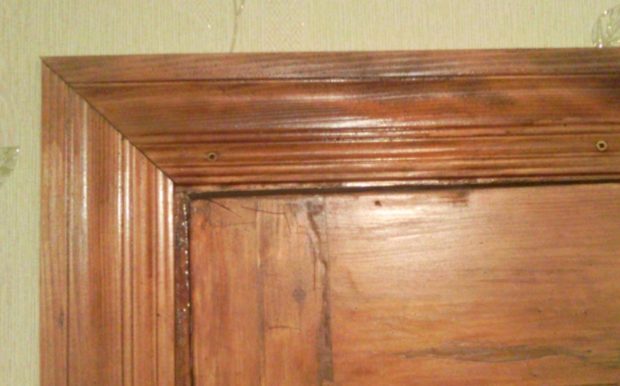 Such a cut is quite difficult to do on your own, but with proper preparation, there is nothing impossible:
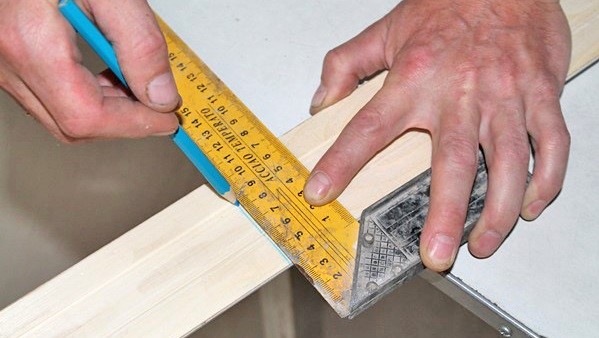
- Any work always starts with markup. This applies to both cases. Start with the side rails. Measure the distance from the floor to the top edge of the door frame and add the width of the platband to the result. Highly important point - not always the length at the point near the door will coincide with the point at a distance equal to the width of the casing. If you suspect that the floors are skewed, it is better to measure at these two points and make an oblique incision. Now for the upper bar. If you will fasten it between the side platbands, you just need to measure the distance from the edge to the edge of the door frame. If the design with oblique joints is more suitable for your design, then two door trim widths should be added to the length of the door frame.
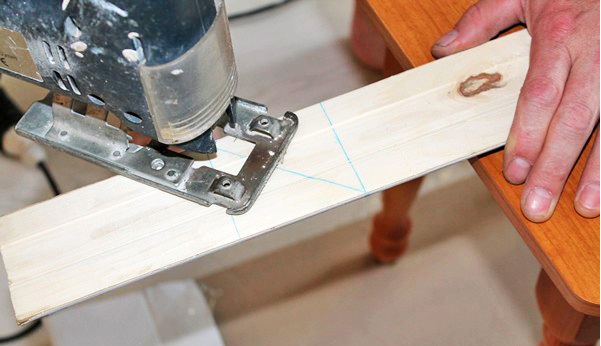
- Now you need to carefully cut the slats into segments of the desired length. Installers of interior doors do this with the help of special equipment. You can do it jigsaw or a hacksaw with small teeth. In the case of cutting platbands from MDF tooth size very important, as a large hacksaw can tear edges, and the cut will be sloppy. Some advise sticking masking tape along the cut line or making a deep line with a sharp clerical knife. Using one of these tips, you can cut more accurately.
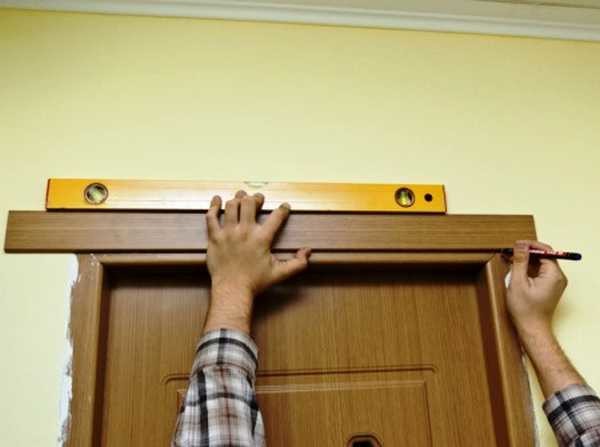
- With the usual horizontal cutting you should have no difficulties. But to execute bevel under 45 degrees sometimes problematic the first time. So that everything goes well, we will give you some little tips. You can file the top and side bar together. To do this, fold them with the back to each other, wrap in several places with masking tape to avoid shifts during operation. On the front side of one of the platbands, it is necessary to draw a cut line. In order not to cut off the excess and not get a short upper bar at the end, you must first draw a square. From the upper left corner down, it is necessary to measure the distance equal to the width of the clypeus and put a point at the appropriate level in the lower right corner. By connecting the top of the left corner with the resulting point, you will get the most correct diagonal. If, due to the increased hardness of the material, it is too difficult to saw two parts together, perform the same marking separately on each bar. In any case, do not despair if the ends come out a little crooked. Furniture wax or sealant under the color of the canvas. You can start cutting with a horizontal bar. To do this, you first need to saw off a segment equal to the width of the door frame plus two platband widths. Then attach it to the wall above the opening and align it horizontally with building level. Now you need to make two marks that will correspond to the top of the right and left upper corner of the box. After that, connect the edges of the clypeus with dots with a line and saw off along it. To make markings on the side platbands, just attach the received segment to their back side and duplicate the bevel obtained on it.
 After that, connect the edges of the clypeus with dots with a line and saw off along it. To make markings on the side platbands, just attach the received segment to their back side and duplicate the bevel obtained on it.
When the cutting of all parts is completed, it is necessary proceed to installation platbands. If you decide to use liquid nails for these purposes, make sure that the surface of the wall and platband is dry and free from chips, dust and other contaminants. When applying glue, do not go to the very edges of the planks by about 1 cm. In this way, you will protect the walls and surface of the casing from the glue, which is sure to go a little apart during pressing. Leaning the platband against the wall, be sure to check its location using a level or plumb line. Until the glue has set, you can adjust the deviation. It is better to start installation with the upper platband. 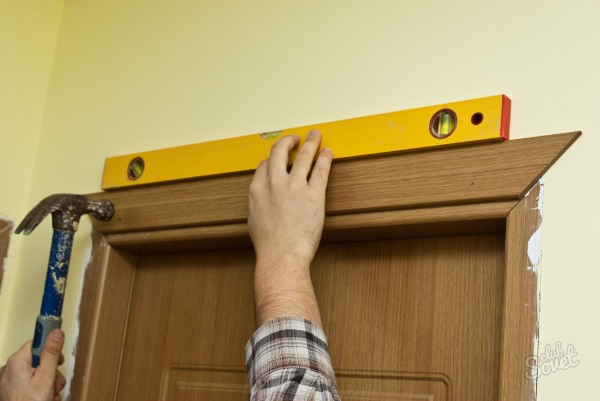
If for some reason the side platbands do not become clear along the line, they can always be filed from the bottom by the required amount. This is much easier than raising the upper bar, thereby increasing the gap between it and the door frame. If we are talking about 1-2 millimeters, it will be imperceptible, and if you missed 5 mm, the platband will not be able to hide the mounting gaps. If you decide to use finishing nails, to facilitate the work, we recommend making a preliminary drilling in the places of their fastening with a drill no more than 1.5 mm. This will help to hammer the cloves without a hat, without putting much effort and to avoid mistakes that can affect the platbands in the form of dents or damage to the coating. 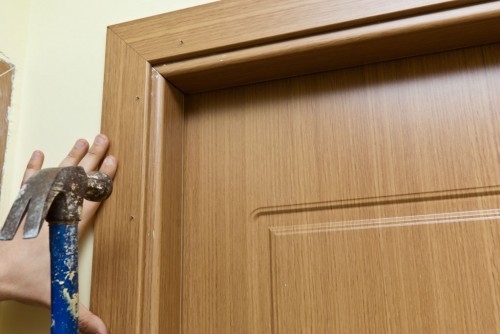 If you are installing light platbands, use light furniture wax to mask the studs. There is no need to carry out fastenings with a step of 10-15 cm. For reliable fastening of a platband about 2 meters long, 5 mounting points are quite enough. After completing the work, hide all the flaws in the junction of the platbands, painting them with wax, or filling with sealant.

 Which interior door handles are better to choose
 How to choose a lock for the interior door
 TOP 10 best manufacturers of interior doors on ...
 The largest manufacturers of interior doors from ...
 What interior doors are best to choose for an apartment: ...
 6 tips for choosing the color of interior doors
 How to choose and buy Italian interior doors: ...
 Interior doors - types, characteristics, installation
 Entrance doors: types, installation methods, installation
 Interior doors to the bathroom and toilet: 8 tips for choosing