6 tips for arranging a canopy (visor) over the porch of a private house + photo
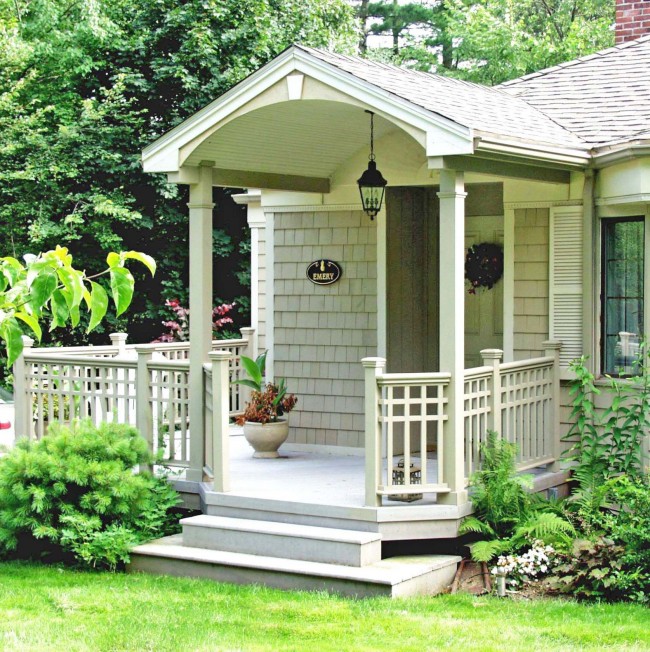
The canopy over the porch is a seemingly rather small part of the building, but without it it is impossible to imagine a private house. It is worth at least once to go out onto the porch in the rain in order to understand how important it is to equip a reliable visor above it. Providing comfort its functions are not limited - a canopy is also necessary for entry group protection from the negative effects of rainfall as well for home decoration. When it comes time to move to arranging the canopy over the porch of the house, a lot of questions arise: from the material of manufacture to the possibility of creating a visor with your own hands. Each of these issues requires detailed consideration, so that in the future the canopy is 100% coped with its tasks.
No. 1. Basic visor requirements
Regardless of whether you will buy a ready-made visor or make it yourself, it must meet some requirements:
- the canopy must support the weight of the precipitation that may accumulate on it, or the plants that will encircle it;
- if possible, the visor is equipped not only over front doorbut everyone needs it porch;
- it is desirable to provide a rainwater collection and removal system;
- the visor must match the style of the house, its entrance group and the plotTherefore, when arranging it, it is necessary to choose suitable materials, colors and shapes. You can apply in its design the same material as for house roofs, or use the same elements as in fencing.

No. 2. Canopy material above the porch
The two main components of any visor are frame and exterior coating. It is from them that the basic strength and decorative qualities of the visor depend. Frame can be wooden or metal (forged or welded from pipes and corners). Metal is more durable and practical, while forged is also a luxurious appearance. A metal frame is the best option, if we are not talking about a wooden house: in this case, it may simply not be combined with the main building. The tree will have to be looked after more, and its longevity is much lower.
There are many options for external coating. Consider the main advantages and disadvantages of each of them.
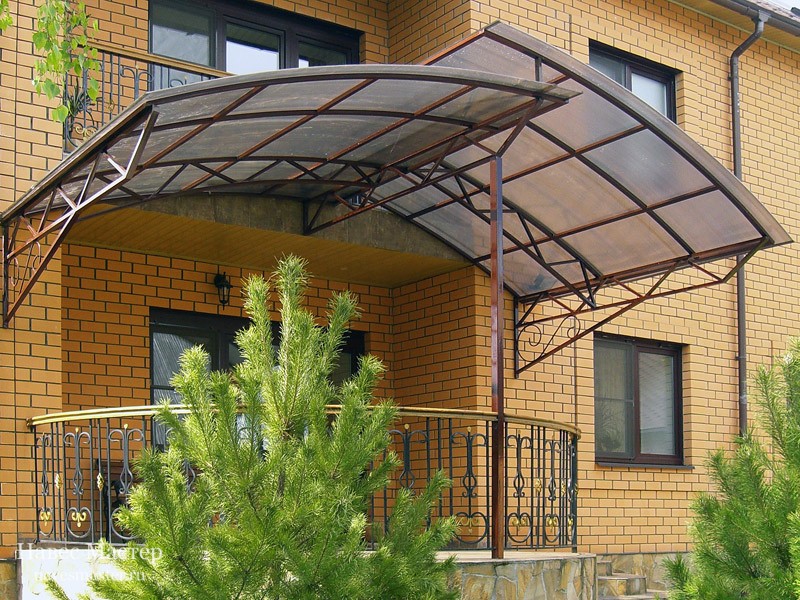
Polycarbonate visor
Translucent Flexible Sheets polycarbonate have found widespread use not only in the arrangement greenhouses, winter gardensarbors balconies and fences, but also in the design of canopies.
Benefits:
- variety of shades;
- ability to scatter the sun's rays;
- low weight;
- high flexibility, so from polycarbonate you can equip a visor of any shape. It’s easy to work with the material, so often if you need to make a canopy with your own hands, the craftsmen choose polycarbonate;
- resistance to wind gusts, fire and decay, ability to withstand solid wind loads;
- durability.
Among disadvantages not the highest resistance to mechanical damage, so scratches and cracks may appear on the material over time. In addition, polycarbonate without a protective coating will darken or turn yellow when exposed to sunlight.
Plastic visor
 Outwardly similar to polycarbonate, special dense plastic for outdoor use differs lower price. In terms of basic properties, the material is very close to polycarbonate, but in strength it is slightly inferior to it. The material is presented in a wide variety of colors, but if desired, the shade can be changed using a special film: during installation or operation.
Metal visor
 Benefits metal visors are obvious: strength, ability to withstand heavy loads, durability, resistance to temperature extremes. Visors of interesting shapes can be made of metal, but still this option is used infrequently due to some reasons: a lot of weight and the need to regularly carry out anti-corrosion treatment.
Visor from corrugated board
 Decking in popularity it can only be compared with polycarbonate. The material, which is a metal coated on both sides with a polymer protective compound, is used to house cladding and balconies, the construction of fences, and also found application as a material for equipping visors.
Benefits:
- durability;
- a wide variety of colors, the ability to simulate other materials;
- low weight and flexibility, which greatly simplifies the work;
- durability.
Decking goes well with a metal frame, and among it disadvantages called excessive noise during rainfall. The material has low resistance to mechanical damage, and it is almost impossible to repair it, so it is better to choose thicker sheets of corrugated board (at least 10 mm).
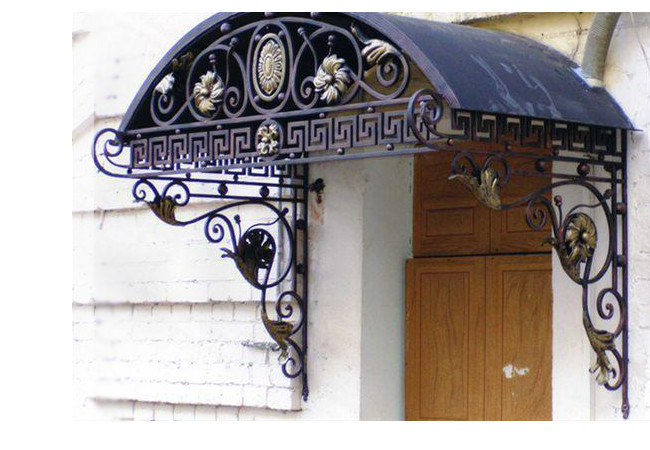
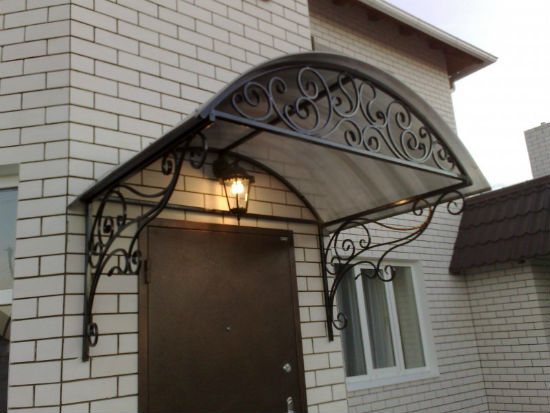
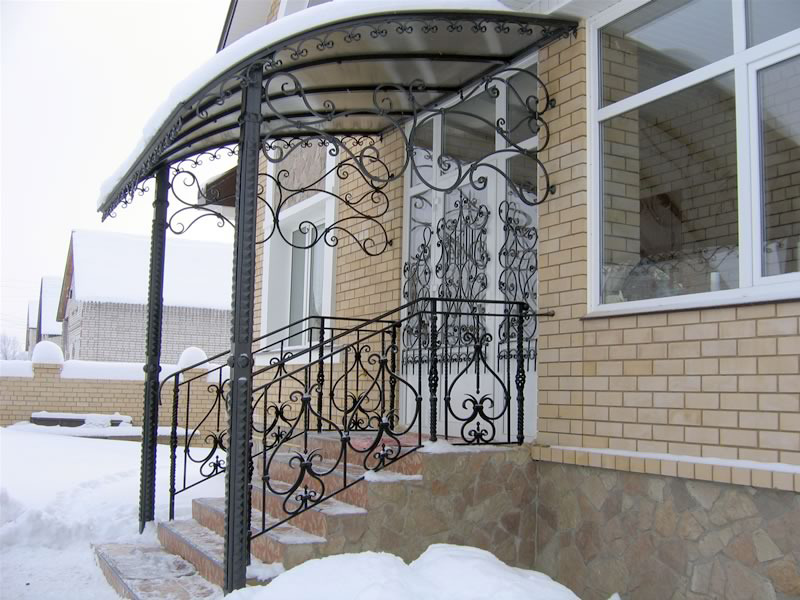
Forged visor
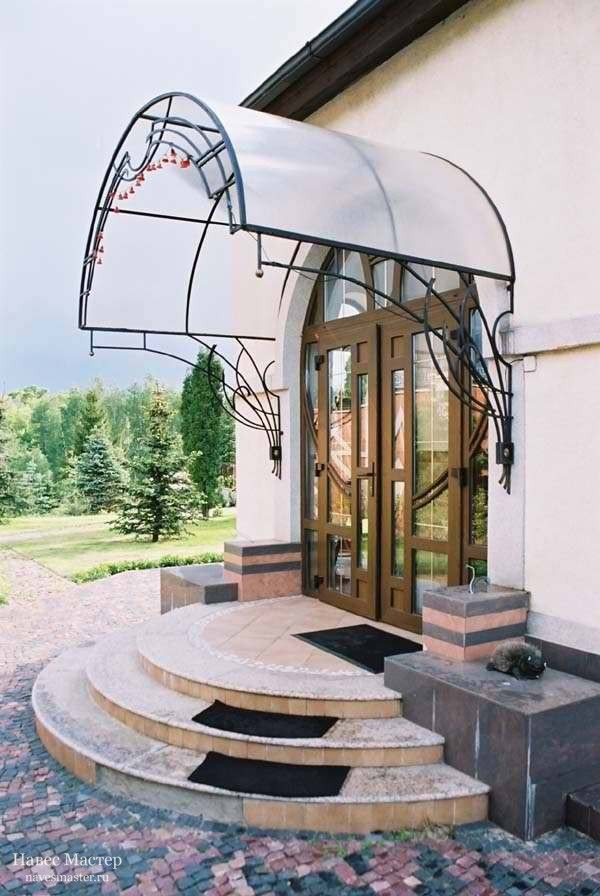
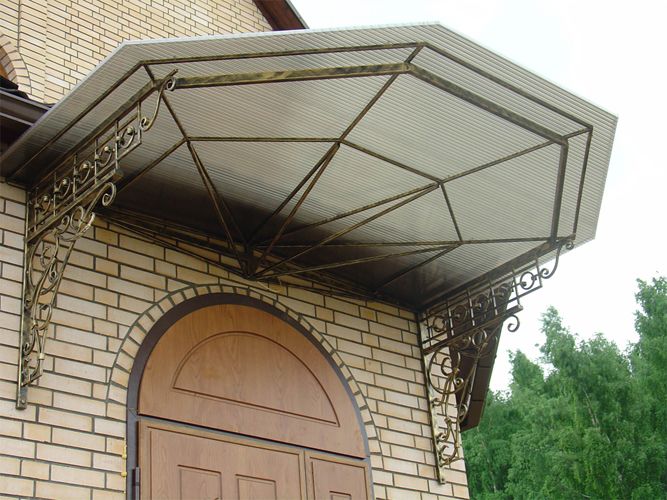
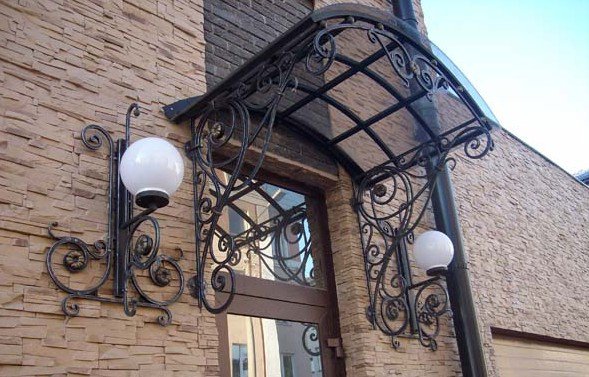 Forged visors above the porch deserve special attention. This is the most expensive option of all, but such a canopy will look luxuriously. Usually forged products are made to order, taking into account all the wishes of the customer. The advantages and disadvantages of these visors are the same as that of metal ones. Not only the frame, but also the roofing part of the peak can be made of forging elements, but in any case, will have to combine it with other materialto provide porch with full rain protection. Excellent forging faces with polycarbonate.
Roof top
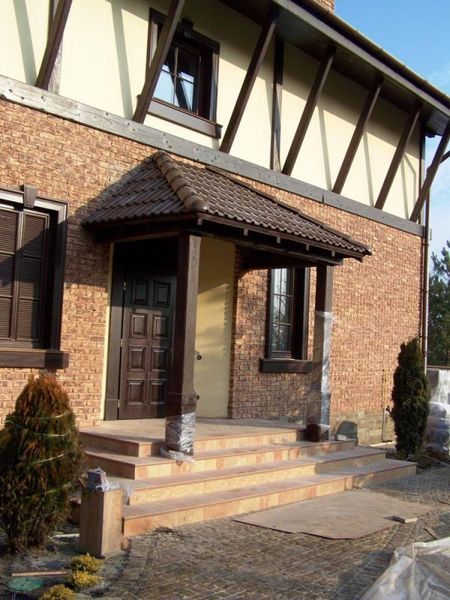 Of metal tiles you can build nice canopies, but they will look best when the roof of the house is made of identical material.
Benefits:
- light weight;
- resistance to mechanical stress;
- durability;
- resistance to moisture, temperature extremes;
- aesthetic appearance.
During rain, the metal tile will give a characteristic sound. If this is a problem, you can use shingles: She, plus everything, has a lower weight.
Wood canopy
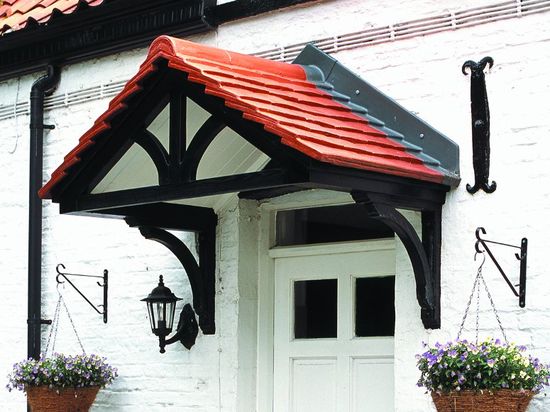
 Wooden canopies can become a decoration of a house built from log house, as well as in good harmony with brick rude buildings. Tree is environmental friendliness and beauty, but is afraid of moisture, fire, insects and mold, so periodically the wood will have to treat with protective compounds. Very rarely, wood is used as an external coating, but a similar option has the right to life - only more care will be needed. More often the wooden frame is covered on top with corrugated board, metal, polycarbonate, slate or tiled.
Glass visor
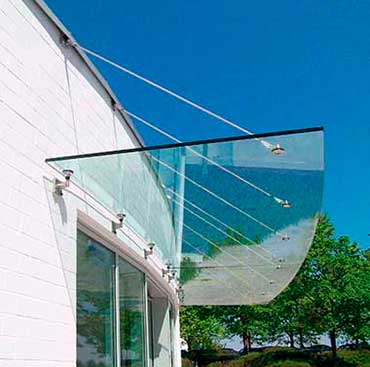
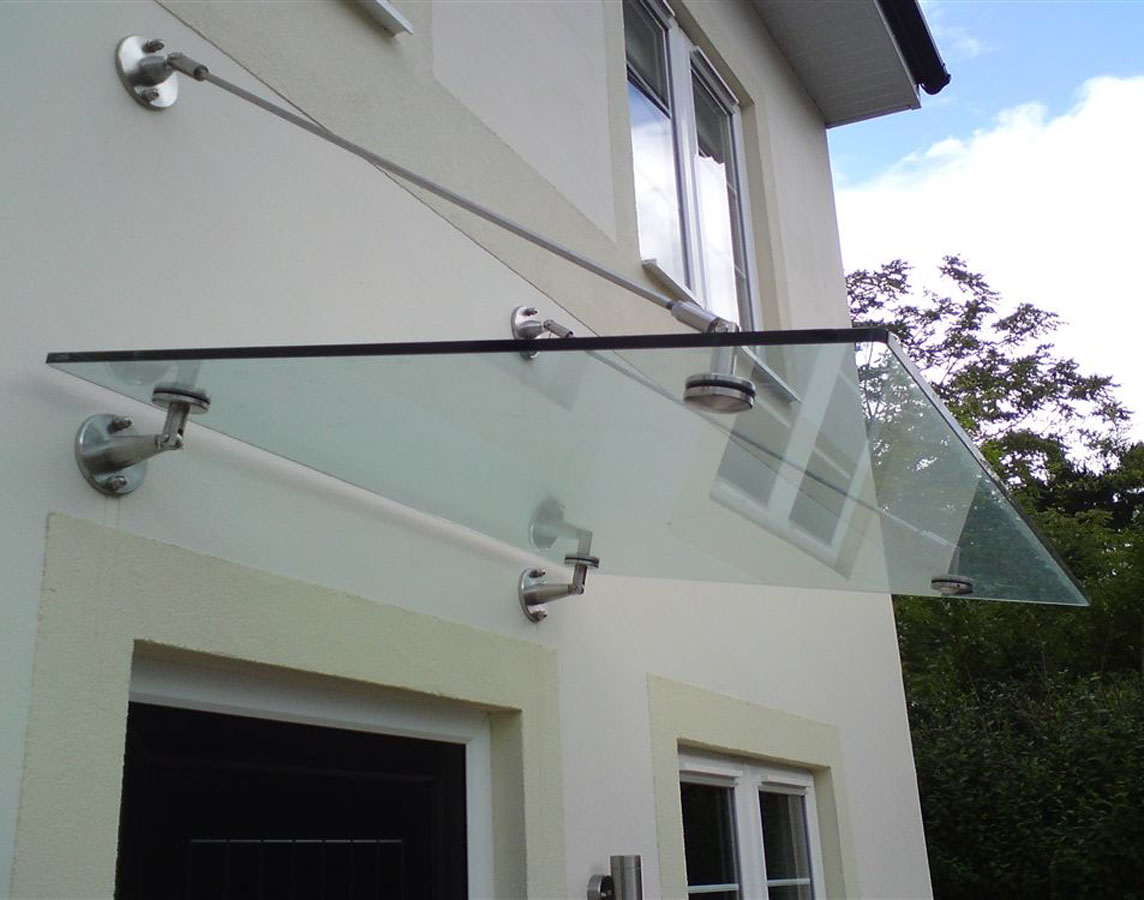 Glass canopy is the solution for the most demanding. Such a visor will be perfectly combined with houses and plots made in the style of hi-tech or minimalism. To equip such canopies, tempered glass is used, which can withstand significant loads, and in case of damage it will not injure anyone. Benefits: Superior appearance, originality and light transmission. In addition, the glass is not susceptible to corrosion, decay, temperature drops him nothing. Minuses: high price and heavy weight.
No. 3. Visor shape
The shape is selected depending on your own preferences, the size of the visor and the features of the house. The most common options are:
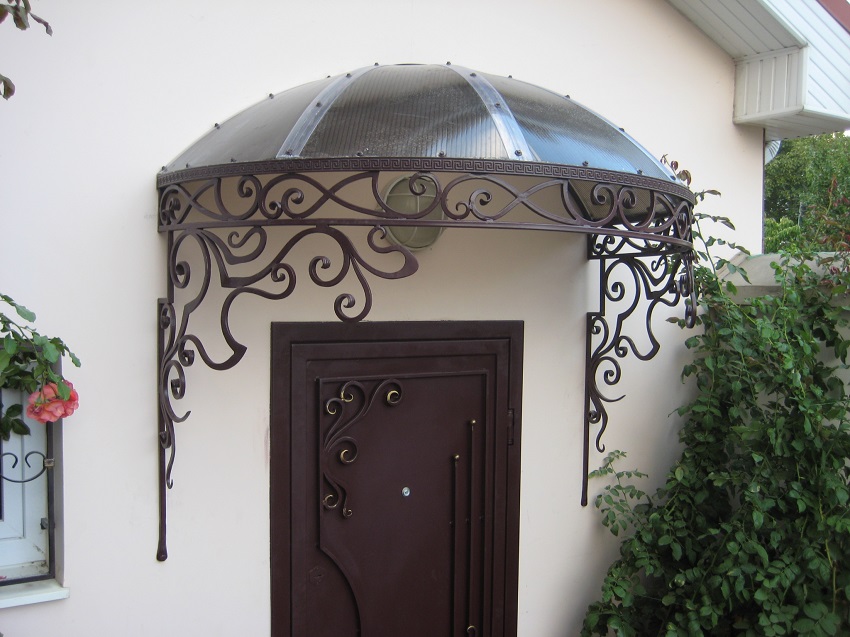
- dome visor. In addition to the original appearance, its advantages include a smaller surface area compared to other types of canopies covering the same area underneath. Consequently, less materials will be needed, and this is a saving. The streamlined shape is an important advantage for areas subject to strong winds;
- arched and semi-arched visors characterized by increased resistance to snow loads and natural water drainage. A semi-arched visor (sometimes called a marquise) will require very few materials;
- single slope visor - This is the most simple to install design, ensuring a normal flow of water. One of the varieties of such a canopy is a visor with a gap;
- gable visor differs in the increased durability, goes well with the same roofs;
- flat visor it makes sense to equip only if it is planned to grow flowers on it. It looks good when the canopy material is glass;
- concave visor provides free convergence of precipitation. An unusual form of such a canopy can become a highlight of the house.
-

Number 4. Visor Mounting Options
The method of attaching the visor is selected depending on what material is used and what area the canopy will be. You can choose from the following options:
- suspension structure. Mounting is carried out on suspensions on top of the visor. Suitable for light materials such as polycarbonate, corrugated board;
- hinged structure fastened with supports to the wall;
- supporting structures characterized by the presence of elements that abut the porch or the ground, are necessary for large and heavy awnings.
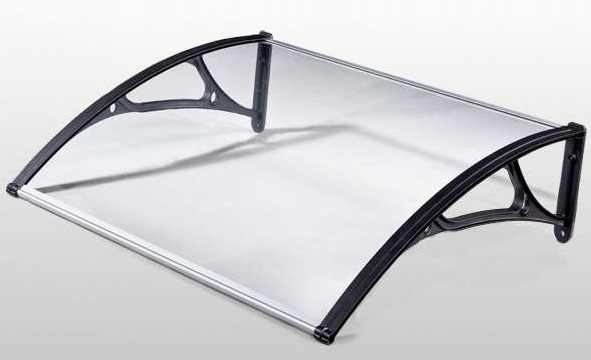
No. 5. Ready-made visor or self-made?
When there are already ideas about what shape, size and what material the visor should be from, it is time to decide who to entrust with its manufacture - to professionals or to yourself. There is a good choice in stores. finished canopies for the porch, the range of such designs is considerable. In this case, the cost of time and effort is minimal, but the design price increases, and the probability of finding exactly what you need is not very high. An alternative is to order a visor for an individual project, but at the same time the price will become even higher.
If you have at least some building and welding skills, enough time and a great desire to save, you can try to make a visor with your own hands. This design will maximize the appearance of the house and the requirements of the owners.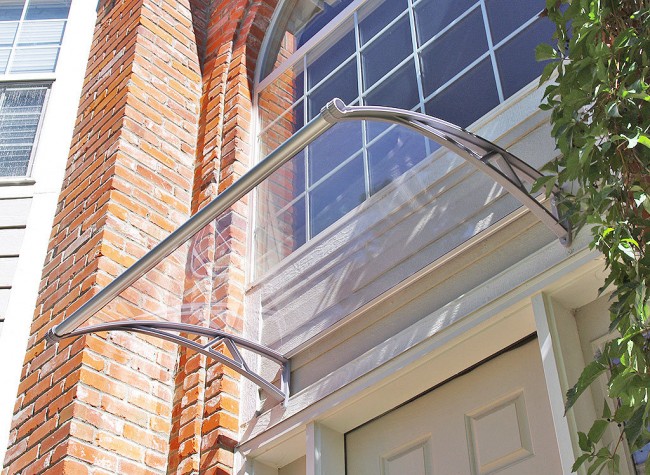
No. 6. How to make a visor with your own hands?
You can try to make simple designs yourself - this is a big savings. With sufficient experience, you can take on complex visors arched form. The entire manufacturing process consists of such stages as designing and calculating the necessary materials, creating a frame (wooden or metal), mounting the frame on the wall and arranging the external coating.
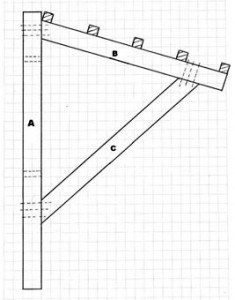
Design
When it comes to construction work, even if not the most serious ones, you can’t do without a drawing. The drawing indicates the shape and dimensions of the future canopy. The width of the visor should be 50-60 cm greater than the width of the front door. The minimum overhang length is 80 cm. If we are talking about a single-slope visor, it is imperative to provide for a slope: the optimal value is 20 degrees. The resulting drawing will help with the installation work, as well as help you figure out how much and what materials will be needed.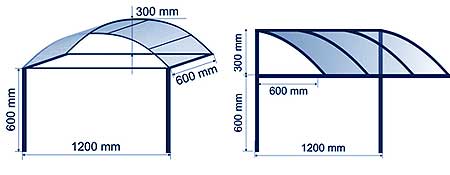
Creating a metal frame
It will be easiest to work with a profile pipe of triangular section. First you need to cut pipe segments of the required size, and then go to welding. The first step is to weld the base of the visor frame in the form of the letter P, then fix the main elements. As a rule, the frame is completely assembled on the ground, much less often they continue to attach some elements already to the frame mounted on the wall.
number jumpers depends on the length of the overhang and the type of material used for coating. If corrugated board will be used, then a distance of at least 30 cm must be made between the rails. The final stage is the installation of the cornice strip, as well as the gutter and pipe, if provided for by the design.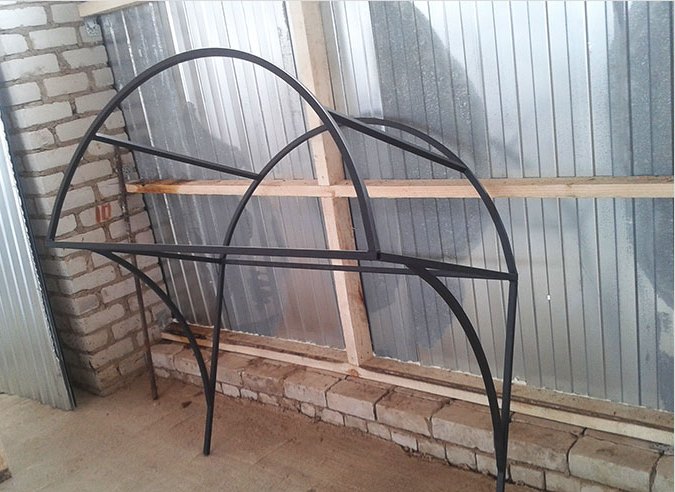
It’s not so difficult to work with direct parts - the complexity increases if necessary arched canopy. In this case, metal pipes are cut with a large margin and bent with a pipe bender or gas wrench. For lack of such tools, you can use grinder. With its help, counter cuts are made on the pipe every 30-40 cm, after which it is bent until the desired radius is reached, and the joints of the slots are connected by welding. The second and subsequent pipes are treated in exactly the same way, and to achieve the same bend, it is necessary to constantly apply the first pipe as a sample. Now it remains to cut off the excess and cook with the workpiece.
If the visor is large enough and heavy, do not forget to weld to the frame emphasisthat will lead from the outside corners of the visor to the wall. When all welding is done, seams can be smoothed with a grinder, then primed and to paint metal. The next stage is the creation of holes in the pipes for fixing the structure to the wall. For this purpose, use an anchor or screws. Small visors are fixed in four places: at the top and bottom from each edge, but large heavy structures will need additional fasteners. Previously, it is better to mark the place where the visor is installed on the wall - this will simplify the work. The cover can be attached to the installed frame.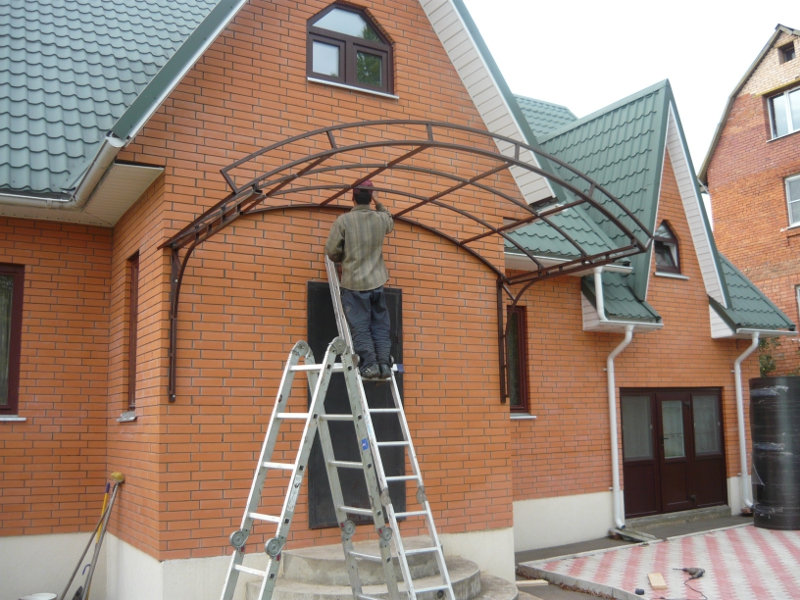
External coating installation
For self-creation of a peak it is better to choose polycarbonate or decking - they are as simple as possible to operate, and in case of installation errors, financial losses will not be so significant. Decking is attached to the frame using roofing screws with rubber washers, polycarbonate - using screws and thermowells.
At the points of attachment to the frame on polycarbonate, holes are drilled. Between the frame and polycarbonates, a silicone or rubber layer is necessarily equipped. The thermal washers are not screwed very tightly to provide the sheets with the possibility of slight displacement. Sections of sheets must be closed with an end profile. It is advisable to leave small gaps between the polycarbonate sheets for thermal expansion. After the material is fully installed on the frame, you can seal the seam at the junction of the canopy to the wall, for which a metal bar is used.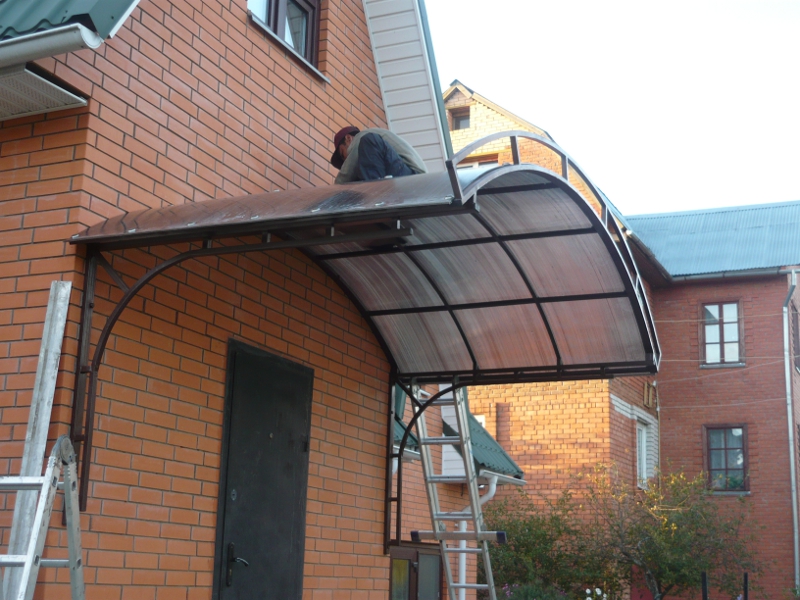
Pedestal visor
For large and heavy visors, the above scheme is not suitable. Not everyone will decide to erect a canopy on supports - the process requires special knowledge and extensive experience, therefore, for informational purposes, we give an approximate sequence of actions. First, supports are made with a distance of not more than 2 m from each other. They can be made of brick, concrete or metal, they require the preparation of the foundation. Recesses for beams are made in the wall, which are laid on supports and in recesses. After this, the rafter part of the visor is erected, the lining and the lower binder are produced, you can arrange a point in the canopy lighting.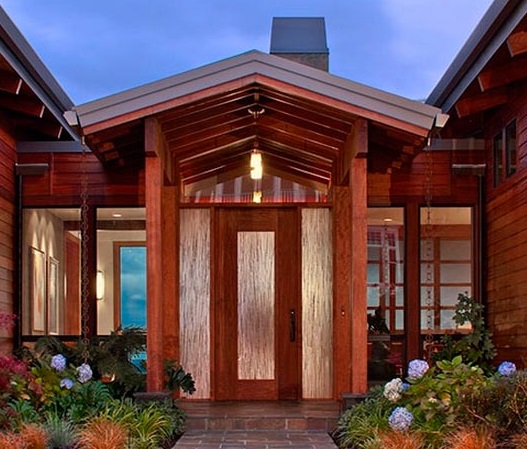
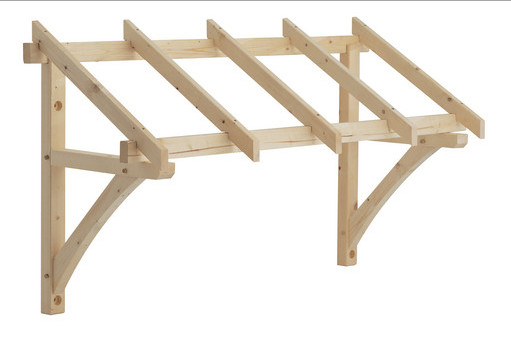
Creating a wood frame
A wood frame can be made with minimal training in construction work. The sequence of actions is as follows:
- it is necessary to mark the line of the future visor above the door, drill several holes, and then fix the wooden block of the desired length using anchors;
- under the installed timber, two vertical timber are fixed at the edges;
- at two angles to the horizontal beam, the bars are fastened, which will become the basis for the installation of the external coating. To support the load-bearing beams, additional beams are mounted leading from the vertical bars;
- if the visor is large, the crate is laid on the beams, and only then - roofing material.
In conclusion
A wide selection of materials allows you to create a visor above the porch of any shape and size, but carried away by the decorative component, do not forget about the basic functions of the canopy. It is possible to undertake independent production if you are completely confident in your abilities, otherwise the process risks turning into wasted money and time.

 Visor over the wooden porch: 5 tips for choosing ...
 10 tips on how to cover the roof of the gazebo in the country + photo
 5 materials for decorating the balcony outside
 7 tips for designing and decorating a private porch ...
 10 tips for choosing a greenhouse to give
 12 tips for choosing material for a summerhouse in the country
 Criteria for choosing natural tiles: type, shape, size
 8 tips for choosing a slate for roofing
 8 tips for choosing polycarbonate for a greenhouse
 17 tips for fencing a country land