9 tips to remove / wash off whitewash
The presence of old finishing materials on surfaces that are subject to fresh finishing work undoubtedly makes their beginning impossible. No matter how you try to get away from the need to remove the old coating, in most cases this is practically impossible. There are materials on the removal of which you really need to work very well and make considerable physical efforts. And there are those that just need to be properly prepared for removal. Today we will consider ways to remove / wash off whitewash from various surfaces. And also we will learn how to properly prepare the room and choose the necessary tools for work.
1. Flush or not flush and why?
Of course, each of us will look for a way to avoid the need to do extra work, especially considering that washing off the old whitewash is a very dirty process. Indeed, there are situations when doing so at all not necessary:
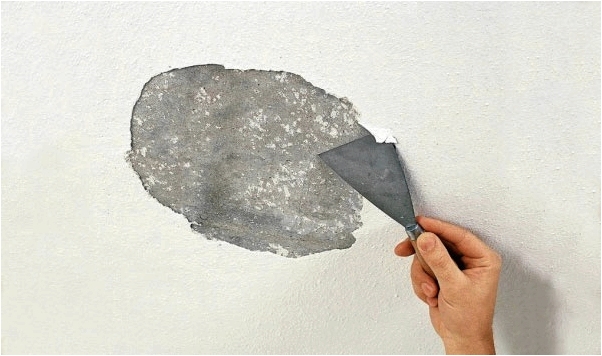
- For example, if you plan to install a suspended or stretch ceiling, the old whitewashing process is not a hindrance. But only if she herself did not begin to exfoliate from the plane. In this case, the exfoliated areas must be carefully cleaned with a spatula. And especially pay attention to the edges. If every movement of the tool is accompanied by a lag of whitewash from the ceiling, then there is a chance that the coating in this place will eventually move on its own. Pieces can fall off on a new ceiling. Therefore, stripping should be carried out until the moment when it is no longer necessary to apply force;

- If walls are processed by whitewashing, the surface of which is planned to be sheathed drywall With the help of profiles, the old solution can also be left. And other finishing materials that are mounted in a frame way can be mounted on an old coating.
Now consider the cases when wash off old whitewash is necessary without fail:
- When is it planned to paint the ceiling with waterproof paint. Even if the layer of the old whitewash itself does not flake and looks normal, it will still have to be removed, since its presence significantly reduces the adhesion strength. Soon, the paint may just fall off from the whitewash;
- The same thing will happen with wallpaper pasted on top of the whitewash. It doesn’t matter if you stick them on the ceiling or on the wall;
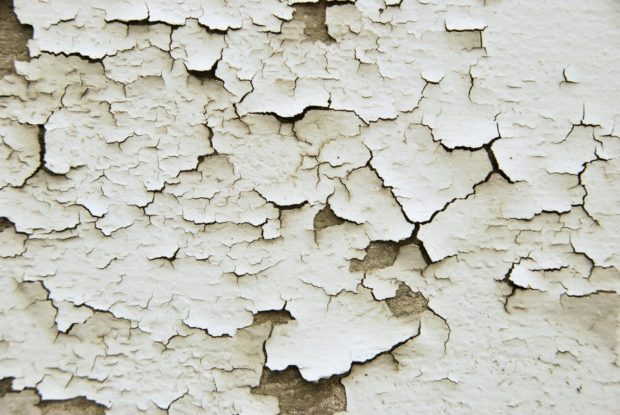
- If there is a need to simply refresh the appearance of the ceiling, then this should be done with a similar solution. Then, provided the integrity of the old coating, it can not be removed. However, if earlier the repair work was not done by you, then it is practically impossible to determine the exact composition. Layering of materials of different density and gravity can lead to cracking. Therefore, in order not to have to do the same job twice, it is better to remove the old whitewash;
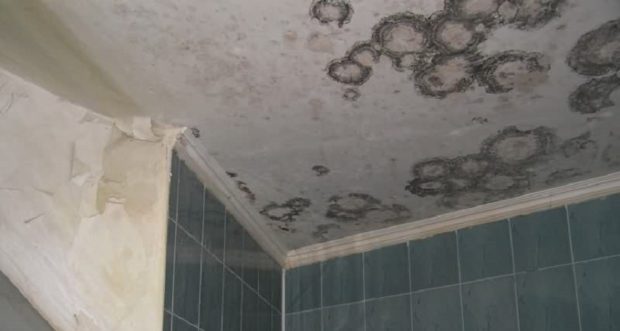
- Be sure to remove the old whitewash if it forms on it. mold. Even if we are talking about the surface of the ceiling, which will be closed by a tensile structure.If in time you do not start the fight against mold and do not treat the base with special solutions, over time it will begin to hit the walls;
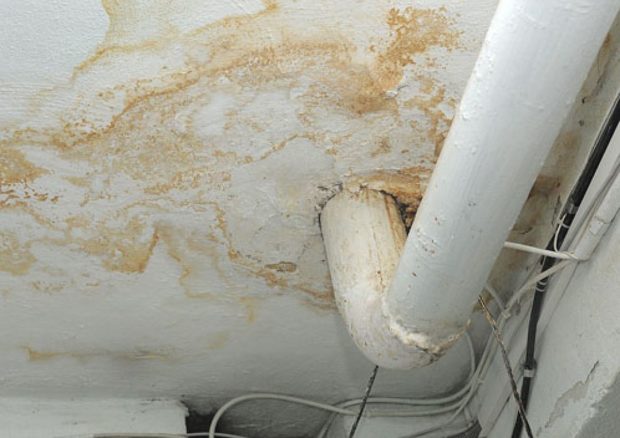
- With prolonged use, noticeable spots may appear on the whitewash. In the kitchen, this process can be triggered by the accumulation of fat and soot. In bathrooms, this can be rust marks from old pipes or a leak from neighbors from above. In any case, you will not be able to hide such defects, as they will appear even through several layers of paint.
A little trick which will help determine the approximate composition of the whitewash - you need to apply a couple of small drops of water to the surface. If they are absorbed, then the main component is chalk. If they remain or begin to drain a little, then lime whitewash.
2. Recommendations for the preparation of the premises
When the scope of work and the need to remove old whitewash are identified, it is necessary to properly prepare the room for the working process. We have already said that the removal of whitewash, the basis of which is chalk, is a rather dirty business. White stains are provided to you. To minimize the process of subsequent cleaning of the room and protect as many things as possible, you need to perform simple actions:
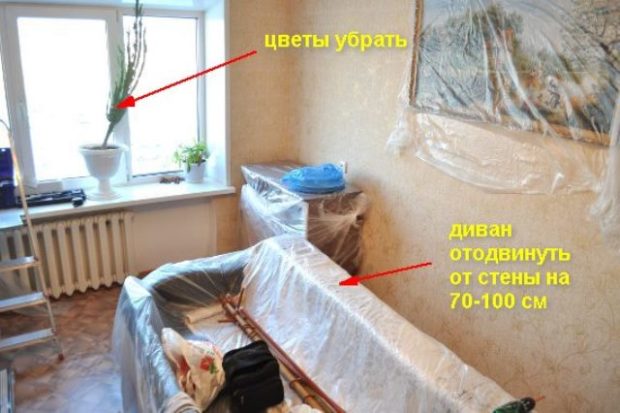
- First of all, if possible, you need to remove as many pieces of furniture from the room as possible. Especially if we are talking about the process of removing whitewash from the ceiling. If the working surface is a wall, then you can simply move the furniture away from it as far as possible. That which is not realistic is to be removed, it is necessary to carefully close it with a dense film and fix it with a film. This is necessary so that if you accidentally touch it, it does not slip completely, and you do not have to straighten it with dirty hands;
- It does not hurt to protect the windows, that is, the glass itself. Also use tape to tape the tape around the perimeter double-glazed window. Be sure to use masking tape, which does not leave an adhesive layer on the surface after removal. Otherwise, you will have to wipe everything with alcohol, and this again is superfluous work;
- When is the removal planned? whitewash from the ceiling, very rarely it turns out to keep the wall covering in its normal form. It is almost impossible to do this if the walls are papered. Adhesive tape on them is not desirable, and it will stay only on a smooth surface, and that is not a fact. Things are much simpler with painted walls, which really can be protected by sticking a film on them. Therefore, please note that in most cases, updating the ceiling plane entails updating the wall covering;
- If possible, do not be too lazy to take off chandelier. Otherwise, tie a plastic bag on each of its shades;
- Now it's time to protect the floor surface. For the best effect, it is recommended to first cover the surface with newspapers, in several layers, and then cover with a film;
- During work, you may need to leave the room. In order not to spread whitewash that has already been removed after the shoes throughout the apartment, be sure to lay a wet rag at the exit and thoroughly wipe your feet.
3. Select and prepare the necessary tool
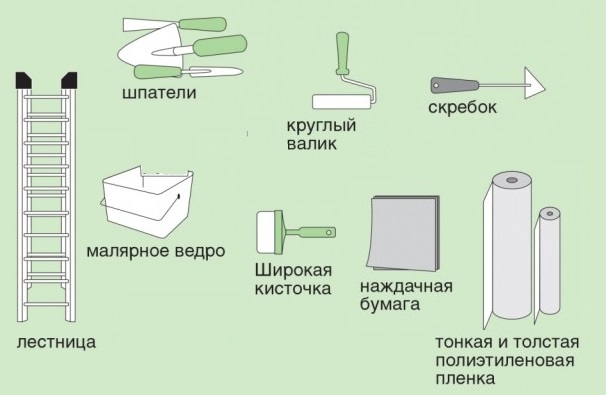
It is very important to reduce the number of your walks around the apartment in dirty shoes for the right tool. What you may need is better cook in advance:
- You will certainly need a spatula with a wide blade;
- If it’s more convenient for you, then you can replace it with a scraper. In many hardware stores, you can find a scraper specifically designed to remove whitewash. It has a special design that is difficult to confuse. Under the scraper itself there is a small dustpan for collecting material. This will make the process not so dirty;
- Sander;
- Brush with the shortest longest bristle;
- Foam sponge or soft rag;
- Foam roller;
- Something wooden or plastic that can serve as a long handle for the roller.Perhaps there is a wooden plank to which you can tape the roller with tape. Perhaps there are remnants of plastic pipes, in general, what is in the household;
- You will also need a container of warm water;
- And always personal protective equipment. We are talking about a headdress and glasses, if the work will be carried out on the ceiling, and about clothes, which then it is not a pity to throw away and closed shoes.
4. The method of removing whitewash using a grinding machine
Now let's move on to the most traditional methods by which you can effectively remove the layer of old whitewash. To the most radical methods dry cleaning can be attributed to a method that involves working with a power tool such as Sander. We can say that this is the tool without which it is difficult to imagine even cosmetic repairs. After all, choosing various nozzles, with its help you can remove and old plaster, and old paint from various surfaces.
To combat the old whitewash, the abrasive nozzle of the largest diameter that can be used on your tool with the greatest grain size is best suited. Further, everything is primitive - press the nozzle against the wall with a little effort and gradually advance. It is especially good to use this method when the whitewashing layer is quite thick. As it is thinning, the nozzle should be changed to a finer-grained one. That is, you do not need to try to get to the base with the same nozzle. Thus, you can quickly cope with the task. Main disadvantage The method is a large amount of dust.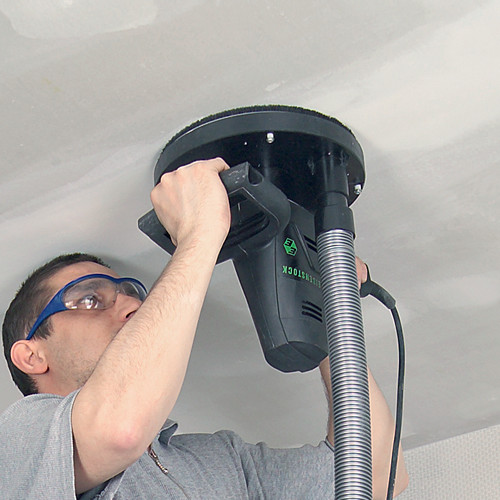
5. Remove the old whitewash with a spatula or scraper and water
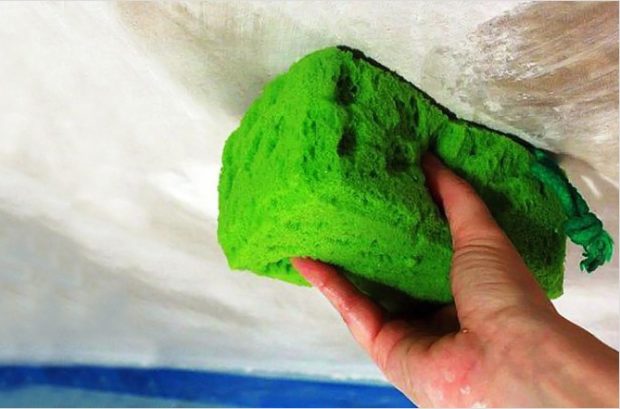
This method will not be so dirty and dusty. To make your task easier, you need a good soften the whitewash. To do this, saturate the surface with water. Choose the tool that is most convenient and easiest for you to work with. The surface can be moistened with a foam roller or simply sprayed with a spray bottle. If the surface to be treated has a large area, no need to try to cover it immediately as a whole. Divide it into small fragments. The optimal size is meter per meter.
Dampen the first sector well, then dampen the next. Now take a scraper and begin to remove whitewash from the first site. While you process the first sector, the second is already saturated enough. Then look at the situation - perhaps the site is too large or, conversely, too small. Make your own adjustments. Moisturize the surface is plentiful, but do not allow the streams to flow directly along the walls to the floor. Also, if you still decide to moisten the entire wall at once and do not have time to process it, it is likely that the water will simply dry out and the whitening will harden again. The process will have to be repeated again. By the way, if you determine that the whitewash is chalky, you can just wash it off with warm water and a sponge.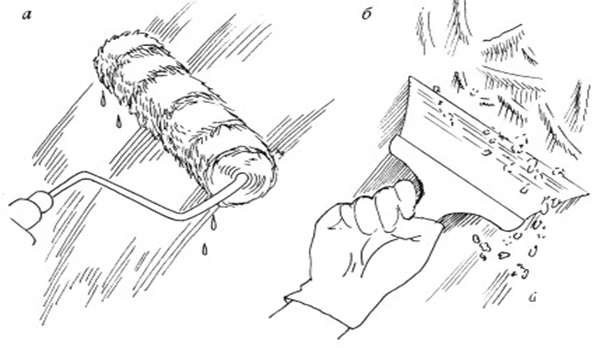
6. Remove the old whitewash from the ceiling with a paste
This little trick will help to cope with the task not only much faster, but also with the least damage to the room. We only need the packaging of the cheapest wallpaper glue or ordinary paste. The mixture is prepared thus:
- 1 tablespoon of flour is dissolved in a small amount of warm water;
- Then pour 1 liter of water into the pan and bring to a boil;
- Dissolved flour is poured into boiling water.
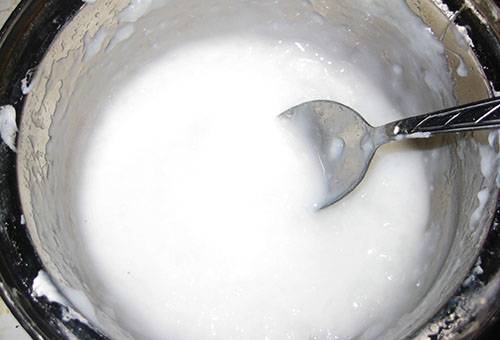
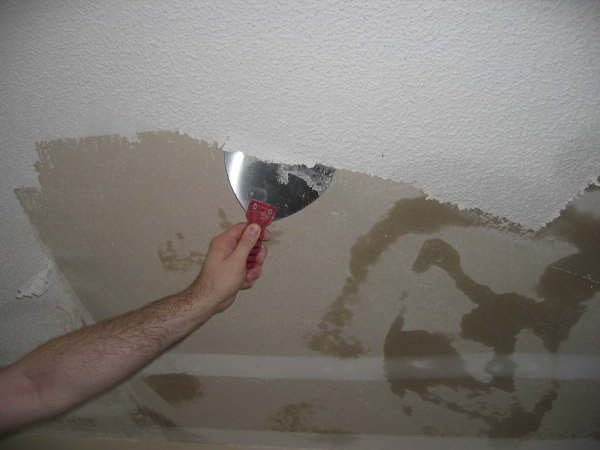
After complete drying, the resulting paste is ready for further use. It must be applied to the ceiling with a roller. Try to distribute the mixture evenly. Now you need to wait 10 minutes to allow the paste to dry. Then start to remove it with a conventional spatula. Beauty of this method lies in the fact that whitewashing will not crumble in small flakes and scatter throughout the room, but due to a denser adhesive base, it will fall off in layers. Cleaning after this will be much easier.And if you use a special scraper with a tray, or wrap an ordinary plastic scoop on a spatula, then pollution can be minimized at all.
7. Method for removing whitewash using newsprint
Old newspapers, which are likely to be found in almost every home, can greatly facilitate your work. This method is good for use both on the ceiling surface and on the walls. We will need the same paste or wallpaper glue, which must be applied evenly to the surface. Over it you need stick newspaper sheets. No need to arrange sheets overlap. Let a small clearance along the contour remain between each. One of the edges of the sheet must be bent and left not glued. When the maple mixture dries, gently begin to tear off the sheets from the surface. To do this, slowly pull the free edge. Avoid jerking and jerking, the sheet may tear. Residual whitewash along the contour of the sheet can then be removed with a spatula.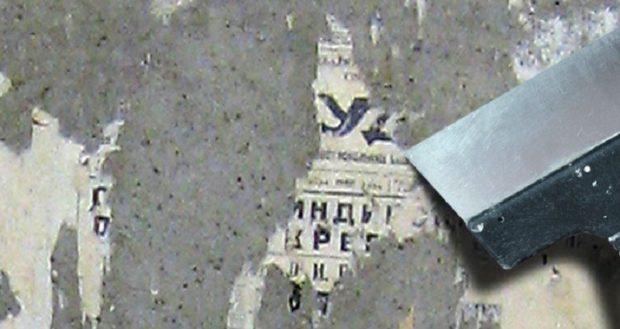
8. Homemade solutions to facilitate removal of old whitewash
Almost every method involves wetting the whitewash layer to facilitate lagging and softening the surface. In most cases, use ordinary warm water, but there is little tricks which will make moisturizing more effective. In addition, all the ingredients will definitely be found in every home:
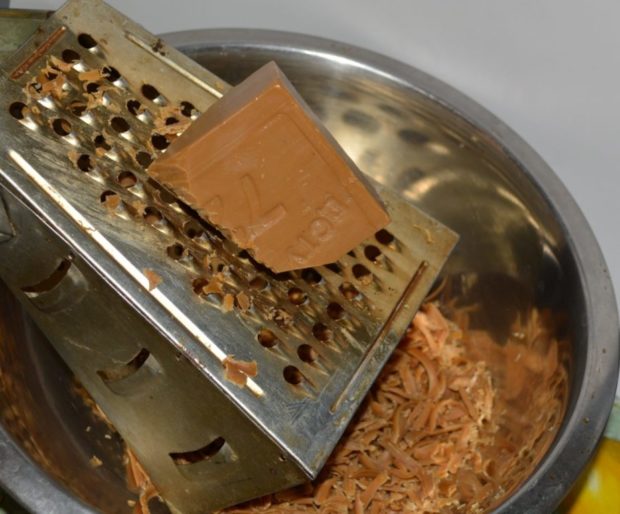
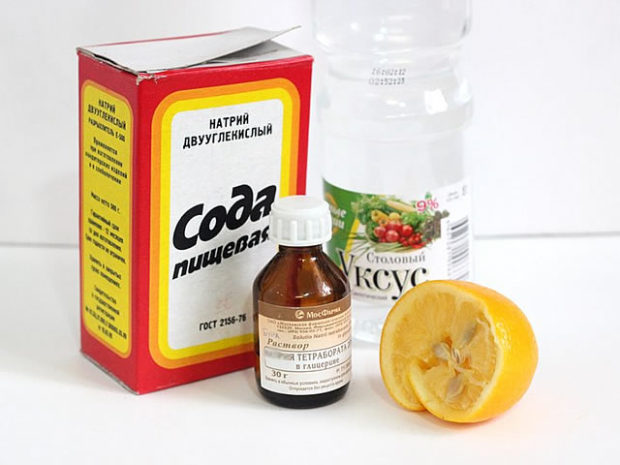
- Cooking soap solution. This method is used by a large number of professional finishers. Moreover, it is not costly at all. You will need soda ash and bar of laundry soap. Pour warm water into a bucket. The recipe is designed for a capacity of 10 liters. Dissolve 5 tablespoons of soda and 2 tablespoons of laundry soap grated on a coarse grater in water. In principle, rubbing is not necessary. Just so it dissolves faster. Now either you can simply wash off the chalky whitewash with a sponge moistened in the prepared solution, or spray the work surface, and then use a spatula. If it was decided to simply rinse off, then it is better to pour the solution a little into a smaller container and rinse the sponge there so as not to immediately contaminate the entire mixture;
- Also often used as a washing solution concentrate cookery salt. To do this, dissolve 1 kg of salt in a bucket of boiling water. After cooling the liquid to about 40 ° C, you can start work. Remember to wear medical gloves to protect your skin;
- Another solution can be prepared on the basis of ammonia and bath foam. Dissolve 2 tablespoons of ammonia in three liters of water and pour 2 caps of any bath foam. Now you need to prepare the soda composition in a ratio of 3: 1 (3 parts of soda) and pour it there. Add another 1 tablespoon of table vinegar and pour 2 liters of boiling water. Thoroughly mix the solution and wait until it cools to a temperature of about 50 ° C;
- Alkaline solution also copes with the task. You will need a container of warm water and plain soda. In 10 liters of warm water, dissolve 5 tablespoons of soda and wait until the water has cooled slightly.
Also exist and already finished products to remove old whitewash, which are sold in many hardware stores. True, their cost will be much higher than the one that you spend on the purchase of ingredients for preparing a home wash. One such remedy is a wash called Probel.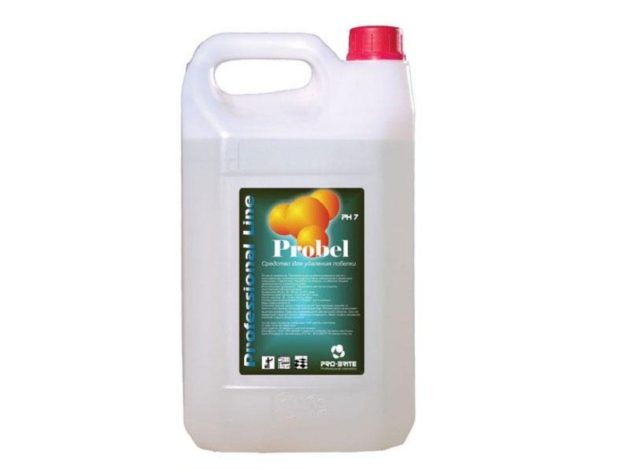
9. A few more tips
We got acquainted with all the possible ways to remove the old whitewash. Now it's time to share some useful tips with you that can significantly facilitate the process:
- If the surface of the walls is even, use a wide spatula that will allow you to remove more whitewash at a time. If the walls are crooked, choose a narrow tool so as not to leave spaces and not return to the same place each time;
- After removing the coating, the surface must be washed thoroughly with clean water. This will significantly increase its adhesive properties.To get rid of white stains, change the water as often as possible;
- If in some places, for example, in hollows on the surface, the layer of plaster is thicker, try tapping it with a hammer before removal;
- To moisten the ceiling surface, it is better to use a foam roller;
- If after removing whitewash you find dark spots on the surface, treat them with normal whiteness. After the liquid dries, they brighten.

 7 Tips for Lime Ceiling and Walls, ...
 10 ways to remove paint from a wall
 Laminate ceiling. How to fix the laminate to the ceiling
 Liquid wallpaper: properties and application
 Coloring heating radiators: choice of paint ...
 5 ways to remove tiles from the wall and floor
 12 materials for decorating the bedroom ceiling
 9 materials for finishing the ceiling in the kitchen
 13 living room ceiling materials
 7 tips for redecorating the bathroom and toilet