6 tips on how to make a garden bench for a summer residence with your own hands + photo
There is nothing nicer after a long hot day than to sit on a comfortable bench in the shade of trees and just relax, enjoying the coolness and birdsong. Or spend time in a large company of friends at your summer cottage. In any case, you need to think about where to place all your guests. To store a large number of folding chairs in the utility room is expensive and not very convenient for money. It is much more practical to build a large comfortable bench once. For this, it is not necessary to seek the help of specialists. In this article we will consider 5 Ways to Make a DIY Garden Bench. This will not only help to significantly reduce the amount of necessary funds, but also provide an opportunity to show imagination and make your bench truly unique.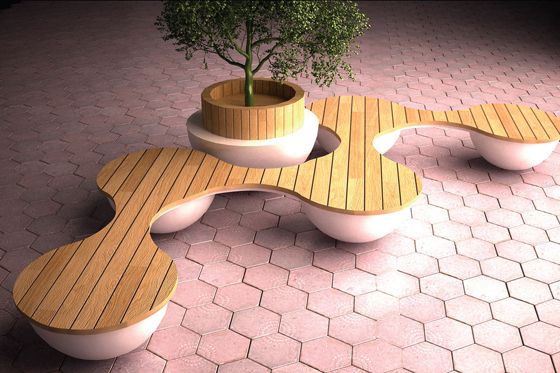
1. General tips
The bench on the site is its integral attribute, and the process of its manufacture is often very interesting and informative. Like any other project, the construction of a bench or a full bench must begin with development exact drawing with all sizes. Why is it necessary:
- In the process of creating a working sketch, you can accurately determine the necessary size of the bench. It is necessary to rely on the number of people who are supposed to be sitting on it. It is better to make it a little longer, or add one extra seat to the desired length just in case, than to look for an additional chair for an unexpected guest later.
- When you see the final version of the drawing with all sizes, it will be much easier for you to calculate how much material is required.
- And, of course, the drawing is a great way of visualization, which will help, if necessary, adjust the appearance of the finished product.

To make it easier for you to decide on the main dimensions, we give an example generally accepted sizes which will create a comfortable product. So:
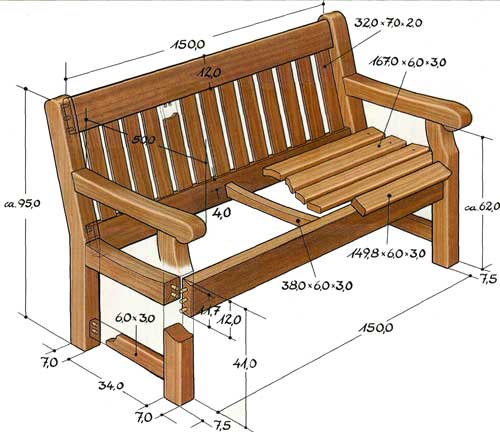
- The height of the seat should be in the range of 45-55 cm from the floor, depending on the average height of all users. This height is optimal, because the legs bent at the knees will form the right angle, approximately equal to 90 degrees. It will be convenient for you to sit and get up. If you make the seat lower, the position of the spine during sitting will be incorrect, and the knees will be above the required point. It will not be easy for older people to get up from that position.
- The depth of the seat is most convenient if it is 50-60 cm. This allows you to take a comfortable position and removes the load from the back and knees when sitting.
- The height of the backrest, if it is planned, should reach the level of the shoulder blades. This is approximately 40-50 cm, depending on the height of the person. It will be convenient to lean on such a back, and even after spending a long time on the bench, the back will not numb.
These standards are not binding. These are only standard indicators that are used by furniture factories in production and are designed for the parameters of an average person. It is possible that you will be uncomfortable with such sizes.That work as a result did not come to naught, you can build on the dimensions of your favorite chair, from which you must first take measurements.
An important role is played by the form future benches. The choice is small, there are only three options, but they all have characteristic differences:
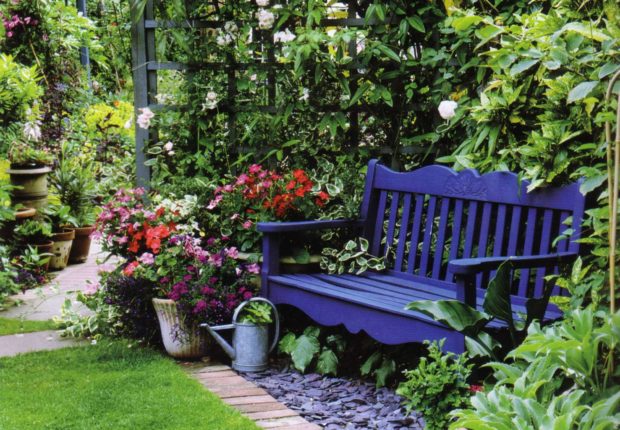
- Straight bench - The most common and easiest option in terms of execution. If you creatively approach the process, it can look very beautiful and modern. Such a bench can accommodate a decent number of people, subject to the availability of additional supports. The main disadvantage is that with such an arrangement of people, there is practically no eye contact. That is why such benches can be found in public places - parks, train stations, near theaters. They have a friendly conversation only with a small length, when people, crouching a half turn, can look at each other.
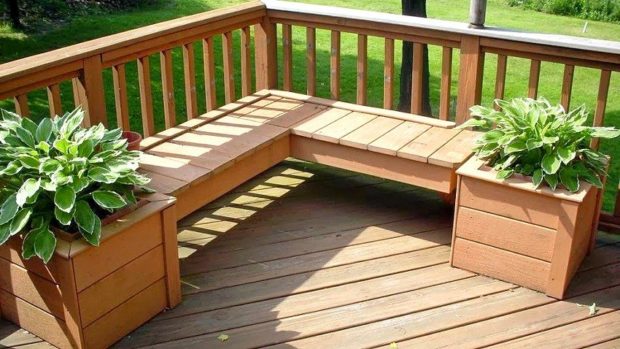
- P-shaped bench - A good option for a large company. Such a bench can be placed in pergola, around a small artificial pond, a beautiful flowerbed or around a bonfire pit. All guests will see each other thanks to its shape. The capacity of this model is very large. Its only drawback is that it takes up much more space than the previous version. But if you have it, then over time, personally verify the convenience.
- Semicircular bench - It has almost the same advantages and disadvantages as the model above with one difference. The rounding point, where the radius will be the largest, is much more convenient to use as a full sitting place than an angle of 90 degrees.
From the foregoing, it is clear that defining criterion influencing the choice of form, the number of people and your personal aesthetic preferences will be.
The next important factor that you need to consider before building a bench is a place her location. Based on the fact that it will be either a corner for privacy, or a resting place of a large company, pay attention to such recommendations:
- A bench of any shape should be placed so that sitting on it, you can admire something beautiful. For example, a small front garden, possibly located near the site of forest or by streambut not neighbors or their own the fence or outbuildings. On such a bench, you cannot relax morally and relax.
- Keep in mind that during the day it is very hot in the warm season, so try to choose a place under the trees. If you already have a gazebo, place a bench inside it. This will save from heat and protect from getting wet in case of rain.
- It is advisable to pre-align the place under construction. If you put a bench on a hill, then climbing up to it, and then not all family members will be able to run down due to age and health condition. The same applies to buildings located in the lowlands.
Well, the last thing to figure out is whether it will be a bench or an ordinary bench and whether there will be a construction portable. The bench is more comfortable, as it implies the presence of a back and armrests. But this is not always necessary, so we will consider both options below. The difference between a portable bench is that its legs do not dig into the ground or are not concrete.
2. Material selection
There are not many materials suitable for a garden bench. Of course, the most economical option will be based on what you are already rich in, for example, old wooden boards, chipboard sheets, the remains of metal structures and other good. In addition, it is worth considering your skills with one or another hand tool and its availability. Well, and, of course, proceed and the budget that you are willing to allocate for the construction. After all, you can make wooden armrests from the remaining materials, or you can order beautiful forged sidewalls with molded armrests. Everything here is purely individual.Consider the three main materials and their strengths and weaknesses.
Wood as the main building material
The tree almost always occupies a leading position in such lists. For a garden bench, such wood species as pine, oak, birch, pear, hornbeam or other deciduous ones are suitable. The main the benefits of this material are:
- Durability and reliability. Wooden structures can withstand significant loads with proper assembly;
- Durability. With the right surface treatment, such a bench will delight you for many years, and in which case it can be easily restored or replaced by individual elements;
- Ease of processing. It is much easier and more pleasant to work with wood than with the same metal. It is more malleable and does not require the use of specific tools;
- In the hot season, the surface does not heat up so much compared to the metal, and in the cold - it cools much less. Thus, sitting on it will be much more pleasant;
- And one of the important pluses is an attractive appearance even without additional decor. Thanks to its natural beauty, a wooden bench will fit perfectly into any locality and will only decorate it.
TO disadvantages wooden products include:
- High sensitivity to direct sunlight, high humidity and low temperatures. Because of this, it is better to place wooden furniture in the arbors or in the most shady places, as well as provide for it canopy or case, or make designs portable;
- The cost of already trimmed and fully prepared wooden blocks can be very high, especially when it comes to artistic carving.
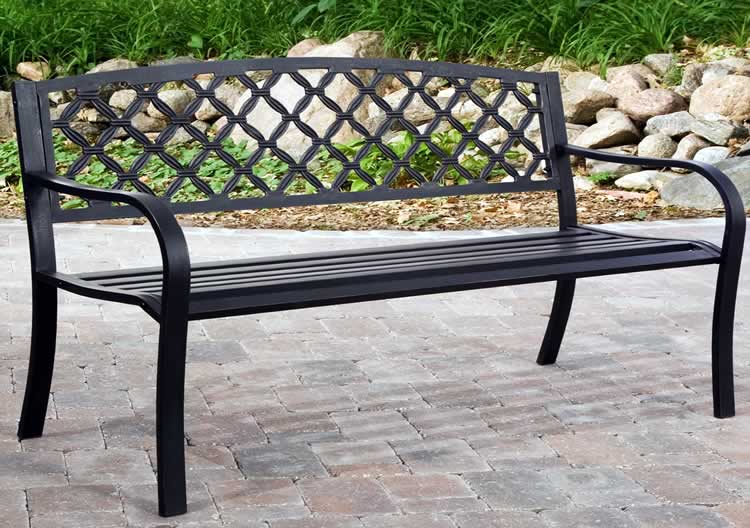
Metal benches
Unlike wood, which are found everywhere, they are not very popular among owners of summer cottages. Despite this, metal products have their own pros:
- They are much more durable than wooden counterparts;
- Less dependent on external weather events;
- May have more diverse forms;
- They look less overall.
disadvantages metal structures:
- The metal is more difficult to process, and the manufacturing process itself will be more laborious. If you do all the elements yourself, then to achieve a good result, you will have to work and welding machine and grinder. In the absence of such equipment, this will incur additional costs;
- The metal instantly heats up in the sun to high temperatures, and in frost it is even covered with ice and hoarfrost. Sitting on such a bench on a hot day can be quite an extreme undertaking;
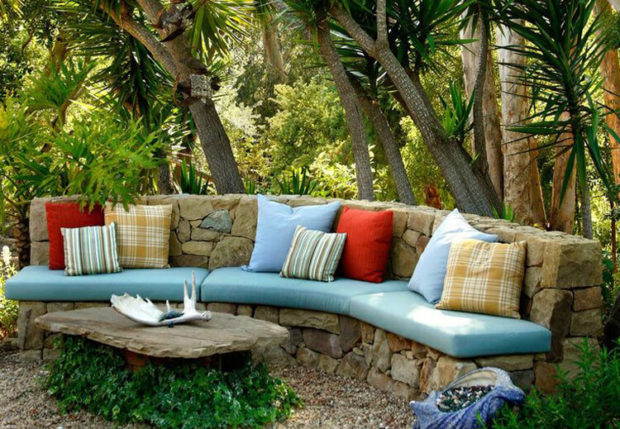
Stone benches
You can meet such buildings only on the garden plots of very wealthy people. Fully stone benches are usually small in size and can accommodate a maximum of a couple of people. They have rather a decorative role in decorating everything. landscape. They can act as a continuation of a large flower bed, fenced with natural stone blocks, be an extension of a stone foundation of the house or a fence, located in front of a small fountain with a beautiful statue in the center. All these are attributes of chic country houses.
Consider advantages stone products:
- High strength;
- Durability;
- Lack of reaction to temperature changes, high humidity or direct sunlight.
Disadvantages of course more:
- The high cost of even small models;
- Significant weight;
- The surface of natural stone is always very cold to the touch, which requires the use of pillows or decorative mats to avoid unpleasant sensations and health problems;
- Even if you decide to lay out a considerable amount and purchase the necessary amount of material, you are unlikely to be able to finish the surface yourself and simply lift up individual elements. This will entail additional costs for the rental of appropriate equipment;
- If no more elements on the site are made of stone, then such a building will not fit into the general situation and will seem superfluous, and you will be sorry for the money spent. Therefore, such a bench is very binding.
To create the most durable bench, you must use the strengths of different materials. Therefore, the most practical products are combined. For example, a wooden bench on metal or stone supports. The fact is that with constant contact with moist soil, the tree can quickly deteriorate and rot. But it does not threaten stone or metal.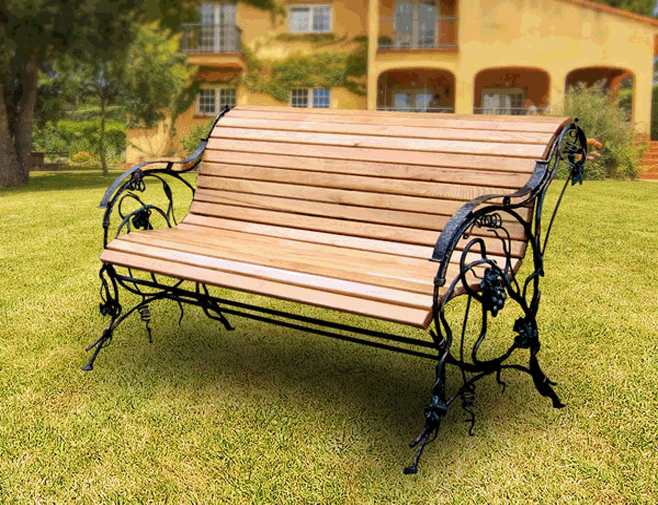
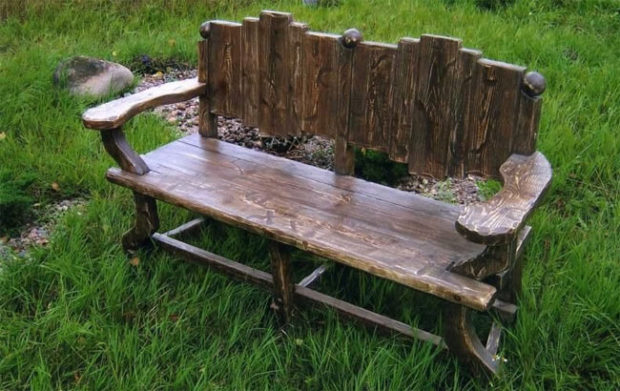
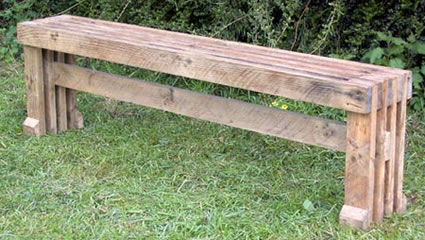
3. We do a wooden bench with our own hands
The most common form of the bench is straightforward, but this does not mean at all that it is impossible to build a semicircular or U-shaped. Just in itself this piece of garden furniture does not imply a long pastime due to reduced comfort. But sitting down in the evening and drinking a cup of coffee or talking on the phone will be quite convenient. For the construction of the shop to us will be required:
- Boards with a width of 15-20 cm and a thickness of at least 3 cm;
- Saw or jigsaw - what is more convenient for you to work with;
- Screwdriver;
- Grinder and grinding wheel ;;
- Roulette;
- Level;
- Pencil;
- Screws 35 mm long;
- Lacquer or paint on wood;
- Brush.
Our design will have a seat, sidewalls and strut, which will give it strength and prevent the appearance of skew sidewalls. The seat can be made both from solid boards, and from pieces. The first option is more preferable. According to the previously drawn drawing, it is necessary to cut Timber for segments of the desired length. Using a tape measure, measure the size and put a mark on each strip with a pencil. Before starting to cut it is better to check if all marks coincide. Try to cut boards into fragments with the least loss. Sawing off the spacer that will be between the sidewalls, do not forget to remove two thicknesses of material. 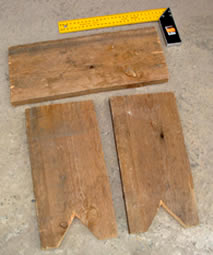 After that you need to carefully to clean all edges and surface. A grinder with a grinding wheel will help you with this. If you make a shop for children, try to round the edges of the boards as much as possible with an arbitrary radius. This will significantly reduce the possibility of injury. Many people think that it is necessary to open with varnish or paint an already finished product, but we will not agree with this. After all, after assembly it will be very difficult to paint over the ends of the boards adjacent to each other. Moisture, which will fall on unprotected places, will contribute to the rapid deterioration of the surface. Therefore, after stripping should processing stage surface paints and varnishes. For a more natural appearance, use clear or tint varnish. If the task is to hide the wooden texture, use covering paints for wood. When all parts have dried, you can polish them with a soft circle and re-open. So the surface will be smoother, and an additional layer will more reliably protect it from external factors. After the second layer has dried, proceed to assembly.
In order not to damage the exterior finish, cover an old sheet or other fabric and mount on it. Using transverse slats, which will be equal to the width of the seat, we fasten its parts. If you use a whole canvas for sitting, then immediately proceed to fasten the spacers, and then the sidewalls. Threaded connections are preferable to conventional nails. Even with heavy loads, they do not slip out of the seat and the fasteners do not weaken. 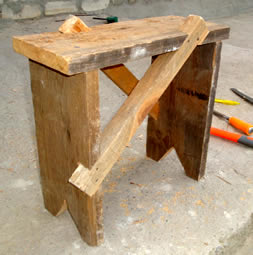 As a spacer, you can use the diagonal bars. To do this, the seat under them is cut out in the seat and sidewalls. You can fix them using metal corners on the inside. After that, the protruding parts are sawn off and ground. In less than an hour, your shop will be ready.If the coating is still damaged during assembly, clean the affected area and repaint it. Then grind and coat a second time.
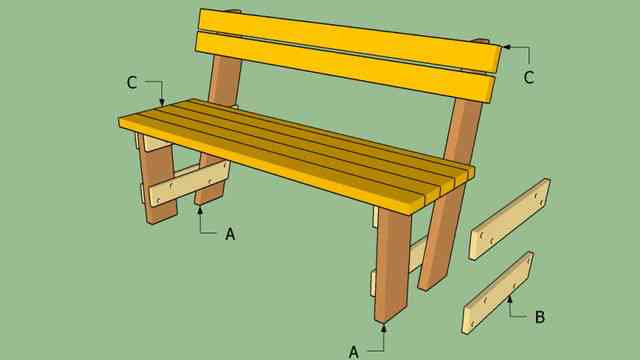
4. Do-it-yourself wooden bench
To begin, we will consider the manufacture of the simplest bench with a back, so that you understand the principle itself. It can be taken as a base in the manufacture of a more complex configuration and form. Our design will have good stability and rigidity. Us will need:
- Long boards for the back and seat (element C);
- Two long supports to which the back will be attached and two short ones that will play the role of the front legs (element A);
- Eight short crossbars that will serve as the binding of the supports and give the structure the necessary rigidity (element B).
Length The boards will depend on the size of the bench. If it is long, make sure that the boards are of sufficient thickness, and will not bend under the weight of numerous guests. It is very easy to do - put the board on bricks and sit on it with several family members. If there are concerns, then it is necessary to add an additional support in the middle to the structure. All elements of the bench are required. are polished. This will not only make the surface more pleasant to the touch, show a unique texture, but also protect you from splintering.
We mentioned above that the design can be mobile or rigidly fixed. This will increase its sustainability. But keep in mind that if you plan dig in the legs into the ground, then they should be at least 30 cm longer. It is at this depth that they will plunge. When all the elements are cut and polished, you can start assembling. To do this, we need a screwdriver and screws. Work must begin with the assembly of the side legs and crossbars. At the place of each connection of two wooden parts, at least two fasteners must be made. so the design will come out more reliable.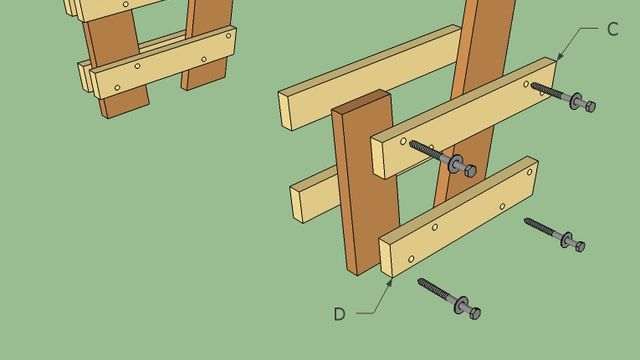 After the sides are ready, you need to fix the seat, which was previously fastened with the same short crossbars. To maintain the straightness of the parties, you can use a construction square. Lastly, the back is tied, and attached to long racks. Between the seat and the beginning of the back, as a rule, leave a small gap. Use additional support or not need to become known for sure after the final assembly. You can always add the missing item without harming the finished bench.
  To protect wooden legs from rotting in contact with moist soil, it is necessary to treat them with tar. To do this, the composition is heated until it becomes liquid and fluid. Then brush gently applied to the legs. Full drying will occur in about a day. Of course, this must be done before assembly. Additionally From Premature corrosion you can protect the caps and screws. To do this, a drill is made at the junction, a shallow flush, the diameter of which should slightly exceed the diameter of the cap, and the depth allows the self-tapping screw to be buried flush with the surface. Now a protective compound is being prepared, which consists of the same tar and small wood chips. A small amount of paste is applied to the hat. After complete drying, it is necessary to grind the protruding elements.
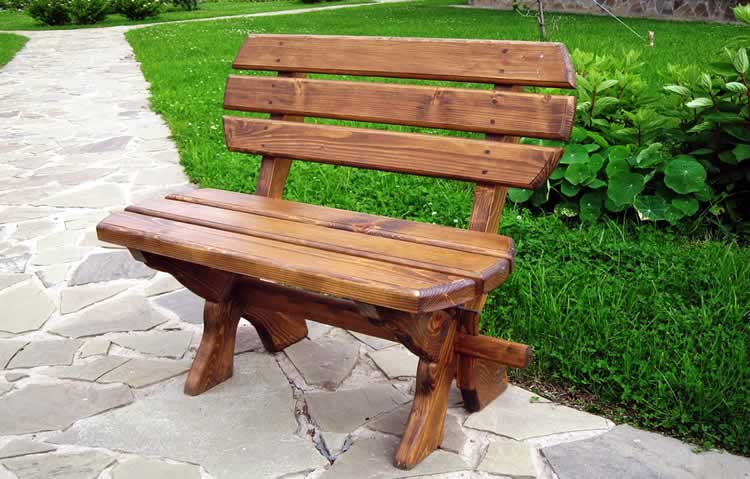
5. Wooden garden bench with metal frame
Such a design will be more durable, but its manufacturing process is more complex and requires special skills. Us will be required following items:
- Iron corner with a shelf measuring 40-50 mm;
- Bar for the manufacture of seats;
- Bolts
- Hacksaw or grinder;
- Drill;
- Screwdriver;
- Welding machine;
- Grinder and grinding wheel.
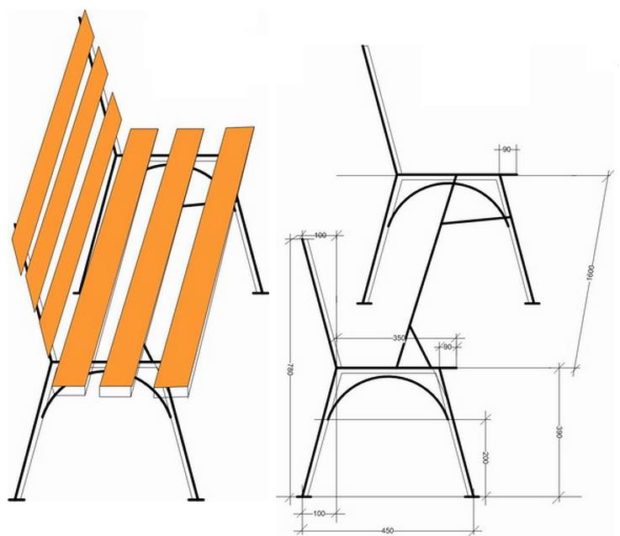
Start work with manufacturing frame. To do this, you will need to cut the metal corner into four segments 1 meter long for the manufacture of vertical supports, five segments 0.5 meters long and two segments 1.5 meters long for the manufacture of supports for the seat and back.To make the back and seat, you will need boards 1.5 meters long and at least 10 cm wide. Boards need to be well sanded and smooth sharp corners. So it will be more convenient for you to sit, and on your feet there will be no traces from the extreme bar on the seat. For reliable protect from moisture You can soak all the wooden elements with an antiseptic.
Now let's start processing metal elements. All edges that will dock with each other, need to be cut at an angle of 45 degrees, as the joints door platbands. Now connect the parts using hot welding. First, the frame for mounting the seat is welded. Legs are welded to it for subsequent fastening of the back to them, and then stops. Remember to use personal protective equipment during welding. At the end of the work, all places of welding joints are cleaned and ground. After that, the metal frame is processed anticorrosion coating and oil paint. The paint must be applied in two layers.
Now it's time to mount the wooden seat and backrest. To facilitate your work, you can perform preliminary drilling at the junction of wooden elements with a metal frame. Now lay all the seat boards on the frame and fasten with special bolts. 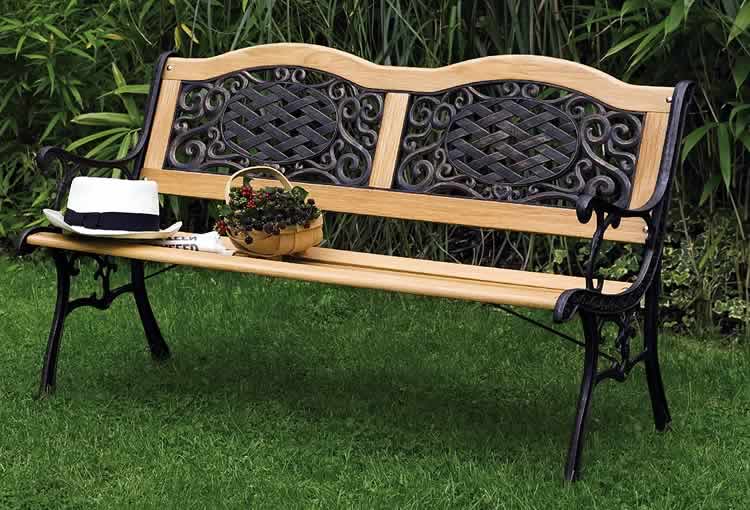 If your bench will stand on the paved or paved tiled section, the legs should have additional support in the form of a lower metal frame. The plane of the legs that will touch the asphalt should have a length of at least 0.5 meters.
Often metal legs concreted into the ground. For this, markup is preliminarily performed. Small pits are excavated, with a depth of about 40 cm. Their bottom is filled up sand to a depth of about 10 cm, fine gravel is poured on top. Gravel is covered with roofing material on top, a reinforcing mesh is laid, and only after that they put a bench on such a base. After that, the remaining depth is filled concrete. Before pouring, you must definitely set the bench by level. Such a complex substrate is made to prevent subsidence of the structure.
6. Wooden bench on stone supports
Another very practical option for making a garden bench. The workflow will be simpler than in the previous case, and not so laborious. Us required:
Due to the fact that such a design will have increased weight, and the brickwork should come out level, the bench must be placed on a flat concrete area. If one is not available on the site, but you must first pour in columnar foundation and let it dry completely. 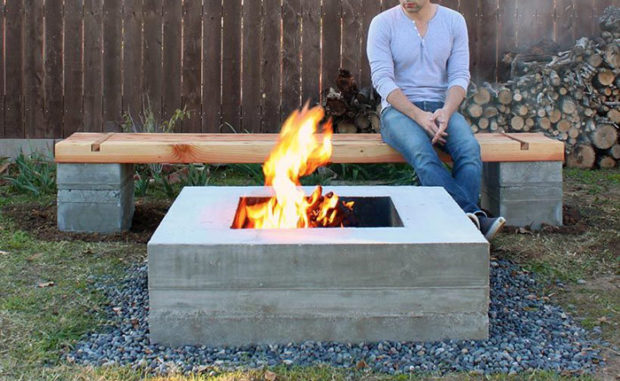 Arrangement of the foundation should begin with marking. At the location of the brick pillars of the future bench, remove the top layer of soil and dig holes 20 × 20 cm in size and 50-60 cm deep. River sand is poured on the bottom of the pits, crushed stone is above. The proportions are the same as in the variant considered above. The crushed stone is compacted, filled with water and left to dry throughout the day. After that, the surface is covered with roofing material and reinforcing bars and poured with concrete. The foundation will harden within 3-4 days. Now we make the basis for future brick racks - on a prepared foundation we put a thin layer of concrete mortar, 1-2 cm thick.
Getting started lay brick with dressing. The width of the masonry is determined by the width of the bench itself. It may be the same or a little narrower. The height of the masonry will be about 50 cm. On the upper row of the masonry, it is necessary to leave space for the formation of a shelf into which wooden bars of the seat will subsequently be laid. They must first be fastened together using transverse boards and self-tapping screws. The finished seat is stacked in brick shelves. To fix wooden boards on a brick surface, you can plant them on the same mortar. The number of brick racks will depend on the length of the bench.
All wood elements before assembly are processed as above. Using the same technology, you can perform not only smooth, but also corner constructions. But in this case, the joints should be located on a solid foundation of a strip type.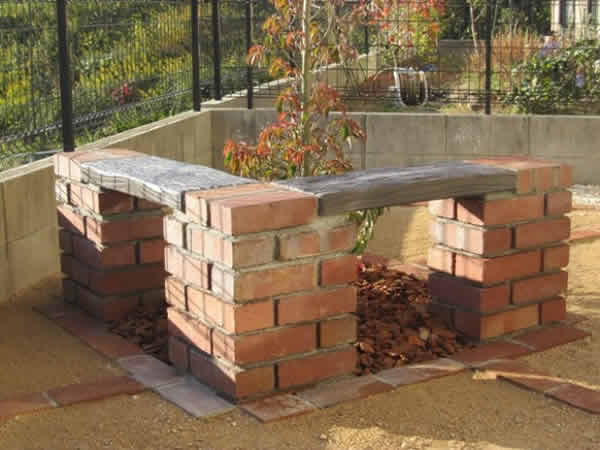

 4 tips for installing a TV in the bedroom
 5 tips for choosing a chair in the living room
 8 tips on which chipper is better to choose
 11 tips for choosing a soft corner in the kitchen
 Hygienic shower for the toilet: 8 tips for choosing
 Choose the size of the curtains: width, length, assembly
 Mowing: 7 Important Rules
 How to choose an office chair: 11 tips for choosing ...
 8 tips for choosing office furniture
 5 tips to do your own drip irrigation